It's time for a color challenge today from Create with Connie and Mary! We have a lovely trio of colors for our design: Soft Sky, Wild Wasabi and Basic Gray.
I chose the set World of Dreams with a sentiment from the Choose Happiness set for my card. First I took a piece of watercolor paper and added Soft Sky and Wild Wasabi to it using an AquaPainter and ink refills. After that was dry, I stamped the branch on it with Basic Gray (I had just reinked my BG pad so the ink is rather dark!) I wrapped Jute Ribbon around the right side and added the sentiment, stamped on Soft Sky and punched out with the Label Bracket punch.
The watercolored paper was layered onto Basic Gray then on Wild Wasabi Designer Paper. A Soft Sky card is the base behind it all.
Stamps: World of Dreams, Choose Happiness
Inks: Soft Sky, Wild Wasabi, Basic Gray
Paper: Watercolor Paper, Wild Wasabi Designer Paper (Subtles Paper Stack), Basic Gray and Soft Sky cardstock
Accessories: Basic Pearls, 1 - 1/4" Jute Ribbon, Label Bracket Punch, AquaPainter, Dimensionals
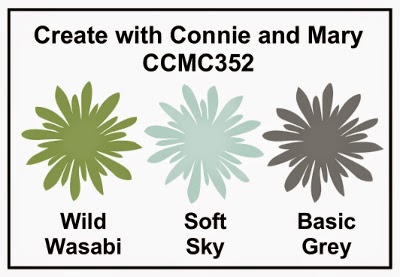
Here again is the color scheme for CCMC352 this week:
Be sure to check out the cards made by the other designers this week; they always inspire me! We would love for you join us this week by creating a card with these colors and uploading them on the Create with Connie and Mary website!
Thanks for visiting today! Happy Stamping!
Margaret
Showing posts with label Watercolor. Show all posts
Thursday, April 23, 2015
Thursday, June 5, 2014
Colorful Mixed Bunch CCMC306
I used the embossing folder stamping technique for the background; these colors were just perfect for it! (Sponging inks onto the inside front of your embossing folder, spritzing with water then laying a piece of watercolor paper down over the ink, pressing gently and randomly. Carefully remove paper and allow to dry). Your background is not actually embossed but you get the design of the folder. Love the look this gives!
The flower stamp is from the Mixed Bunch set, stamped in Perfect Plum onto Perfect Plum cardstock. I stamped a second flower center on Shimmer White, punched it to layer on the flower center then applied dots of Dazzling Diamonds onto the white dots. I stamped a portion of this flower again on a Wild Wasabi scrap and tucked it underneath the flower for leaves. The banner is also Shimmer White cardstock stamped with the sentiment then wrapped with that yummy Coastal Cabana Baker's Twine. This looks so perfect for spring and summer greetings!
Stamps: Mixed Bunch, Papillion Potpourri, Gifts of Kindness (sentiment)
Inks: Perfect Plum, Coastal Cabana, Wild Wasabi
Papers: Watercolor Paper; Wild Wasabi, Perfect Plum and Shimmer White cardstocks.
Accessories: Hexagon TIEF, Coastal Cabana Baker's Twine, Blossom Punch, 7/8" Scallop Punch, Sponge Daubers, Dazzling Details, Stampin' Spritzer, Bitty Butterfly Punch, Glue Dots, Dimensionals.
Be sure to check out the cards from the other Challenge Team members this week at Create with Connie and Mary! gorgeous! And while you're there, see the guidelines for participating in the challenge... it's fun plus a great creative activity!! We would love to see what YOU do with this color combo!
I appreciate your visit today and your comments are always welcome! Thank you!!
Margaret
Tuesday, January 7, 2014
Watercolor Wonder Note Cards!
Watercolor Wonder is one of the new product suites in the 2014 Occasions Catalog and it features lovely soft colors as well as coordinating stamps and accessories. One such product is the set of Watercolor Wonder Designer Note Cards and Envelopes on page 23.
The set contains 20 printed, pre-scored cards on watercolor paper, heavier than regular cardstock, four each of five designs! Twenty Ivory envelopes are also included!
These cards are so pretty and make up so easily! Here I added a strip of Watercolor Wonder Designer Series Paper (#132994) and a focal point stamped with the new Sale-A-Bration set "You're Lovely" and diecut with a Deco Label Framelit! So quick!
The roses on this card are pre-printed in shades of Tangerine Tango; the focal image was stamped with Crisp Cantaloupe and diecut with the Deco Label Framelit, as was the first one! How EASY-PEASY is that?!
I hope to get some more done soon; I do have other new Occasions and Sale-a-Bration sets and accessories calling my name, as well as I'm trying to get some deep cleaning done around here too! Busy-busy!
Do check back soon for more updates and samples! Shop my online Stampin' Up! website HERE for these and other products!
Stay warm and safe in all this crazy cold weather!
Margaret
Sunday, May 12, 2013
Serene Silhouettes CAS
I've just recently gotten this Serene Silhouettes set and am enjoying the stamps in it. This is the third image I've used; I think these plants look similar to Queen Anne Lace...
I used the same acrylic block watercolor stamping technique for this background that I've used on several cards lately: Just Believe, Serene Silhouettes 1 and Serene Silhouettes 2.
The colors used for the block stamping are Pool Party, Calypso Coral and Soft Suede. I love how the colors blend together so softly; however, I was rather surprised at the color that came out of the Soft Suede with this technique, but I like it with the other two colors! The image was stamped with Early Espresso.
The only embellishment is three medium Pearls on the upper right side of the card. I liked the clean simplicity of the image so much that I decided I would leave it as is for the time being and add the sentiment later before I send it.
I hope you enjoyed the card; thanks for visiting!
Margaret
Tuesday, May 7, 2013
Serene Silhouettes Branches
I played some more with the acrylic block stamping technique; this time I used three colors: Calypso Coral, So Saffron and Marina Mist.
It came out with this cool look which I thought paired well with the clouds print in the Sunshine and Sprinkles Designer Series Paper.
I used the birds and branches stamp in Basic Gray over my background and layered that onto coral. "For You" is from the A Round Array sneak peek stamp set. The bundle of stamp set and 7/8" Scallop Circle Punch is still available (until May 30) at a pre-catalog savings of 15% off!
That's it! It is really fun to make these backgrounds and tie them in with designer papers or whatever color scheme you want to use!
Stamps: Serene Silhouettes, A Round Array (click HERE for more info)
Inks: Calypso Coral, So Saffron, Marina Mist, Basic Gray
Papers: Sunshine and Sprinkles Designer Series Paper (Spring catalog)
Accessories: 7/8" Scallop Circle Punch, So Saffron 3/8" Taffeta Ribbon
To order any of these products, click HERE to go to my Stampin' Up! store! Thanks!
For more samples with this technique, see here and here.
Thanks for visiting; Happy Stamping!
Margaret
It came out with this cool look which I thought paired well with the clouds print in the Sunshine and Sprinkles Designer Series Paper.
I used the birds and branches stamp in Basic Gray over my background and layered that onto coral. "For You" is from the A Round Array sneak peek stamp set. The bundle of stamp set and 7/8" Scallop Circle Punch is still available (until May 30) at a pre-catalog savings of 15% off!
That's it! It is really fun to make these backgrounds and tie them in with designer papers or whatever color scheme you want to use!
Stamps: Serene Silhouettes, A Round Array (click HERE for more info)
Inks: Calypso Coral, So Saffron, Marina Mist, Basic Gray
Papers: Sunshine and Sprinkles Designer Series Paper (Spring catalog)
Accessories: 7/8" Scallop Circle Punch, So Saffron 3/8" Taffeta Ribbon
![]() |
| Serene Silhouettes stamp set |
![]() | |
| Spring Surprise Bundle: A Round Array set + 7/8" Scallop Circle Punch! |
To order any of these products, click HERE to go to my Stampin' Up! store! Thanks!
For more samples with this technique, see here and here.
Thanks for visiting; Happy Stamping!
Margaret
Saturday, May 4, 2013
So Long, Old Friends
It's that time of year when we have to say goodbye to some of our beloved "friends"... stamps, colors, accessories; oh, yes, you know, don't you! I chose some for this card and used the acrylic block stamping technique for the background.
Bashful Blue, Certainly Celery (both retiring) and Wild Wasabi (current) are the colors in the background which are overstamped with the Just Believe stamp (retiring) in Elegant Eggplant ink.
The card base is Wild Wasabi cardstock. "Happy Birthday", stamped in Elegant Eggplant on Certainly Celery cardstock (retiring), is from the Curly Cute set, a well-used favorite of mine, (you guessed it, retiring)!
A small Elegant Eggplant button, a touch of twine and some Basic Pearls are the finishing touches.
I love the simplicity of this card, and the fresh greens and blue tones are clean and crisp.
Thanks for looking, everyone! Hope you enjoy your weekend!
Margaret
p.s. I'm not too sad... we will have lots of NEW "friends" to get acquainted with soon! : )
Thursday, April 11, 2013
Serene Silhouettes CCMC247 Challenge
Today's card was made for the Create with Connie and Mary Challenge CCMC247 this week, which is a sketch!
I used the Serene Silhouettes set and a print from the International Bazaar Designer Paper. For the background
I used the technique of applying ink to an acrylic block, misting then stamping it onto my cardstock. After it dried I stamped my image using Soft Suede ink.
To the left is the sketch for CCMC247 this week. Very simple sketch with a multitude of possibilities!
The image was diecut with one of the Oval Framelits then layered onto a Soft Suede diecut with the largest of the Apothecary Accents Framelits.
The "heartfelt" greeting is from the Fabulous Phrases set of thirty phrases, stamped onto a scrap of the technique background and anchored with the smaller bronze filigree button from the Artisan Embellishments Kit. A tie of Linen Thread is the final touch.
I'm so thrilled to tell you today that I've been invited to be on the Create with Connie and Mary Challenge Team! I'm pinching myself! lol! Today is my first card and I look forward to a great time on this team of wonderful paper artists! There is a challenge every Thursday over at Create with Connie and Mary; you are invited to come on over and check out the lovely samples made by all the team members and then make a card of your own using the challenge! Next upload it to their site... it's really quite easy! Then come back during the week to check out all the cards that participants have uploaded!
Thanks for dropping in today!
Margaret
I used the Serene Silhouettes set and a print from the International Bazaar Designer Paper. For the background
I used the technique of applying ink to an acrylic block, misting then stamping it onto my cardstock. After it dried I stamped my image using Soft Suede ink.To the left is the sketch for CCMC247 this week. Very simple sketch with a multitude of possibilities!
The image was diecut with one of the Oval Framelits then layered onto a Soft Suede diecut with the largest of the Apothecary Accents Framelits.
The "heartfelt" greeting is from the Fabulous Phrases set of thirty phrases, stamped onto a scrap of the technique background and anchored with the smaller bronze filigree button from the Artisan Embellishments Kit. A tie of Linen Thread is the final touch.
I'm so thrilled to tell you today that I've been invited to be on the Create with Connie and Mary Challenge Team! I'm pinching myself! lol! Today is my first card and I look forward to a great time on this team of wonderful paper artists! There is a challenge every Thursday over at Create with Connie and Mary; you are invited to come on over and check out the lovely samples made by all the team members and then make a card of your own using the challenge! Next upload it to their site... it's really quite easy! Then come back during the week to check out all the cards that participants have uploaded!
Thanks for dropping in today!
Margaret
Wednesday, March 13, 2013
Swallowtail Butterfly
My what big wings you have, my dear! lol! Yes, this Swallowtail butterfly stamp is large, and just as beautiful as it is large! This is my first card using this stamp new in the Spring 2013 Catalog.
Lastly I stamped the Happy Day from Ciao, Baby! set in Soft Suede and clear embossed it, colored it with Stampin' Write Markers then punched it with the Petite Curly Label Punch (#129405, available free during Sale-a-Bration with a $50. order). A loop of Pool Party Seam Binding Ribbon attached to the back of the punchout then to the cardfront with a Dimensional is the finishing touch!
I can see that I will really enjoy using this stamp and with any number of techniques also!
Thanks for visiting today, and remember Sale-A-Bration ends Friday, March 22.... but it's best to get your order in before the rush of the last day!
You may purchase these or any other Stampin' Up! products from my secure online Stampin' Up! store HERE using Mastercard, Discover or Visa, and they will be shipped directly to your door from Stampin' Up! You may also order through me OR order at a Stampin' Up! party!
Sale-A-Bration is a great time to join Stampin' Up! Because of Stampin' Up!'s 25th Anniversary this year, you will receive 25% more in self-selected products in your "Starter Kit" for the same low cost to join: only $99. for $156. worth of products! Wowsers! If you live in the United States, I would love for you to sign up with me! Just contact me here or sign up on my Stampin' Up! website here. Just click "Join the Fun" and follow the steps!
Margaret
The butterfly was stamped in Soft Suede (new foam pad) onto Sahara Sand cardstock then embossed with Clear Embossing Powder. I then gently stamped the " waterspots" stamp from the French Foliage set with Sahara Sand ink on the background.
I used Stampin' Up! Watercolor Pencils, ink pads, Blender Pens and an AquaPainter (sparingly as I wasn't using watercolor paper) to color the butterfly. I then spritzed the cardfront with Champagne Mist in alcohol and followed with the Color Spritzer and my Soft Suede Stampin' Write Marker.Lastly I stamped the Happy Day from Ciao, Baby! set in Soft Suede and clear embossed it, colored it with Stampin' Write Markers then punched it with the Petite Curly Label Punch (#129405, available free during Sale-a-Bration with a $50. order). A loop of Pool Party Seam Binding Ribbon attached to the back of the punchout then to the cardfront with a Dimensional is the finishing touch!
I can see that I will really enjoy using this stamp and with any number of techniques also!
Thanks for visiting today, and remember Sale-A-Bration ends Friday, March 22.... but it's best to get your order in before the rush of the last day!
You may purchase these or any other Stampin' Up! products from my secure online Stampin' Up! store HERE using Mastercard, Discover or Visa, and they will be shipped directly to your door from Stampin' Up! You may also order through me OR order at a Stampin' Up! party!
Sale-A-Bration is a great time to join Stampin' Up! Because of Stampin' Up!'s 25th Anniversary this year, you will receive 25% more in self-selected products in your "Starter Kit" for the same low cost to join: only $99. for $156. worth of products! Wowsers! If you live in the United States, I would love for you to sign up with me! Just contact me here or sign up on my Stampin' Up! website here. Just click "Join the Fun" and follow the steps!
Margaret
Monday, October 12, 2009
Ornament Punch Vase!
Happy Columbus Day in the USA today!
Happy Thanksgiving Day to our wonderful Canadian neighbors!
Ooh, the Ornament Punch found in the Holiday Mini Catalog is so cool! I'm having fun using it for non-ornament cards. Today it is used to make a vase for flowers!
I used the same sheet of Melon Mambo card stock texturized with the Damask Texturz Plate that I used on the flower petals in my last post here. and just punched out another ornament and trimmed the pointed end off flat. I sponged the edges with the same color ink, shaped it a little with my fingers and laid it aside.
Next I wheeled Certainly Celery ink (the lighter version of Old Olive) onto a Whisper White Top Note (cut with the Big Shot and the Top Note die) with the new Texture Jumbo Wheel. Then I stamped the flower stem from Flower Fancy with Always Artichoke ink on that. I then colored the images with a Blender Pen and inks. I stamped an additional large flower onto a piece of white, colored it as I did the other, cut it out and applied it directly on top of the first one with a Dimensional. It really is eye-catching that way! You can see the dimension a little better in the second picture; click on it to see it larger.
I then added the vase with a Dimensional in the center.
The sentiment from the All Holidays set was stamped in Always Artichoke using the Stamp-A-Ma-Jig for placement.
The card base is Melon Mambo, then a layer of Whisper White then a stripe layer from the package of Old Olive Patterns Designer Series Paper. {Seems like I use so much Old Olive that I knew I would really benefit from having a whole package of DSP just in Old Olive! Sure enough, I'm already using and enjoying it!} Melon Mambo Polka Dot Grosgrain Ribbon was applied diagonally over the Whisper White and Old Olive layers. The Top Note layer was added last.
Just another use for the Ornament Punch! Of course, it also works beautifully with the coordinating stamp set Delightful Decorations, as seen here, here, here, here and here. But it truly can be used other seasons of the year too! It's not just for Christmas any more!
Thanks to Ellen Kemper and others for coming up with the vase idea for this punch. I don't know whose idea it was first, but it was a good one! Stampers are SO creative!
Thanks for dropping by! Hope you have a good Monday!
Margaret
Happy Thanksgiving Day to our wonderful Canadian neighbors!
Ooh, the Ornament Punch found in the Holiday Mini Catalog is so cool! I'm having fun using it for non-ornament cards. Today it is used to make a vase for flowers!
I used the same sheet of Melon Mambo card stock texturized with the Damask Texturz Plate that I used on the flower petals in my last post here. and just punched out another ornament and trimmed the pointed end off flat. I sponged the edges with the same color ink, shaped it a little with my fingers and laid it aside.Next I wheeled Certainly Celery ink (the lighter version of Old Olive) onto a Whisper White Top Note (cut with the Big Shot and the Top Note die) with the new Texture Jumbo Wheel. Then I stamped the flower stem from Flower Fancy with Always Artichoke ink on that. I then colored the images with a Blender Pen and inks. I stamped an additional large flower onto a piece of white, colored it as I did the other, cut it out and applied it directly on top of the first one with a Dimensional. It really is eye-catching that way! You can see the dimension a little better in the second picture; click on it to see it larger.
I then added the vase with a Dimensional in the center.
The sentiment from the All Holidays set was stamped in Always Artichoke using the Stamp-A-Ma-Jig for placement.The card base is Melon Mambo, then a layer of Whisper White then a stripe layer from the package of Old Olive Patterns Designer Series Paper. {Seems like I use so much Old Olive that I knew I would really benefit from having a whole package of DSP just in Old Olive! Sure enough, I'm already using and enjoying it!} Melon Mambo Polka Dot Grosgrain Ribbon was applied diagonally over the Whisper White and Old Olive layers. The Top Note layer was added last.
Just another use for the Ornament Punch! Of course, it also works beautifully with the coordinating stamp set Delightful Decorations, as seen here, here, here, here and here. But it truly can be used other seasons of the year too! It's not just for Christmas any more!
Thanks to Ellen Kemper and others for coming up with the vase idea for this punch. I don't know whose idea it was first, but it was a good one! Stampers are SO creative!
Thanks for dropping by! Hope you have a good Monday!
Margaret
Saturday, May 30, 2009
Manhattan Roses Anniversary Card
This new Manhattan Textured Impressions Die is just an invitation to creativity! I've seen so many beautiful things done with it and have enjoyed using it for a number of projects myself. Today's card features an experiment. :) I saw all the beautiful watercolor roses (done like on my Mother's Day card here) but at the time I made this card about a month ago I didn't yet have the Fifth Avenue Floral set. I decided to use my Manhattan Impressions Die (it's an embossing folder rather than a die that cuts) and see what I could do with that.
I first ran a quarter sheet of Shimmery White cardstock through the Big Shot in the Manhattan Impressions die, then heavily misted that with water. With my AquaPainter dipped in dye reinker, I added color to the rose. I used several different colors of reinker, and actually I've done so many now that I'm not sure what I used, lol! However, I believe it was Riding Hood Red, Summer Sun, and perhaps Tangerine Tango. The dyes blended somewhat and spread because the lines were not heat embossed. I really liked the effect, and several friends have said it looks like tie-day!
When it was dry, I trimmed out the background, leaving only the roses, and added a Circle Fire Rhinestone Brad to the center. Although I didn't use Apricot Appeal when coloring the rose, that color of cardstock really looked the best with it to use for the card itself. Who would have known! I stamped a background in VersaMark using the branch from Eastern Blooms and embossed the sentiment with VersaMark and White Embossing Powder then adhered the roses. I was happy with the way it turned out.
We're going to a 50th Anniversary reception today and will be giving this card to the celebratory couple.
Hope you have a great day and weekend!
Margaret
I first ran a quarter sheet of Shimmery White cardstock through the Big Shot in the Manhattan Impressions die, then heavily misted that with water. With my AquaPainter dipped in dye reinker, I added color to the rose. I used several different colors of reinker, and actually I've done so many now that I'm not sure what I used, lol! However, I believe it was Riding Hood Red, Summer Sun, and perhaps Tangerine Tango. The dyes blended somewhat and spread because the lines were not heat embossed. I really liked the effect, and several friends have said it looks like tie-day!When it was dry, I trimmed out the background, leaving only the roses, and added a Circle Fire Rhinestone Brad to the center. Although I didn't use Apricot Appeal when coloring the rose, that color of cardstock really looked the best with it to use for the card itself. Who would have known! I stamped a background in VersaMark using the branch from Eastern Blooms and embossed the sentiment with VersaMark and White Embossing Powder then adhered the roses. I was happy with the way it turned out.
We're going to a 50th Anniversary reception today and will be giving this card to the celebratory couple.
Hope you have a great day and weekend!
Margaret
Sunday, March 8, 2009
Heartfelt Thanks Revisited
It's good to visit old friends occasionally, and that's what I'm doing today. Heartfelt Thanks is such a beautiful set and I wanted to use it again while it is still current in the catalog. I also dusted off my Watercolor Crayons which have been neglected for awhile but yield lovely results with not a lot of effort!
To stamp the flower, I used my AquaPainter to pick up pigment from the end of the Pretty in Pink crayon and apply it to the blossom area of the stamp, then did the same for the stem and leaves with a different AquaPainter and the Old Olive crayon. I then lightly misted the stamp and stamped it on a piece of Naturals White cardstock. I laid this aside for it to dry a little while I worked on another part of the card then came back to it. Using my Stamp-A-Ma-Jig, I stamped the sketch lines in Basic Brown over the flower. I "clipped" one lower corner with the Eyelet Border Punch, layered it on a Chocolate Chip piece and added a pink rhinestone brad to the corner. A small bit of Kiwi Kiss underneath adds just a touch of needed green accent.
A piece of Pink Pirouette cardstock was stamped with Pink Pirouette using the single bloom stamp; it's very subtle and you can barely see it in the photo. The Eyelet punch adds a lovely bottom edge and shows up so well when the pink was layered onto a card base of Chocolate Chip. Pink grosgrain was tied around the pink before adding the image layers.
Stamps: Heartfelt Thanks
Inks: Basic Brown, Pink Pirouette
Paper: Chocolate Chip, Pink Pirouette, Naturals White, Kiwi Kiss
Tools: Eyelet Border Punch, Stamp-A-Ma-Jig, Aqua Painter, Water Mister
Accessories: Pink Pirouette Striped Grosgrain Ribbon, Fire Round Rhinestone Brad (pink)
I designed this for a Make n Take at a workshop a few days ago and I also needed a birthday card for my granddaughter, so I used that sentiment inside. I hope she will enjoy this card as much as I enjoyed making it! : )
Thanks for dropping by today! I always appreciate your visits and comments!
Have a great day; have fun stampin'!
Margaret
To stamp the flower, I used my AquaPainter to pick up pigment from the end of the Pretty in Pink crayon and apply it to the blossom area of the stamp, then did the same for the stem and leaves with a different AquaPainter and the Old Olive crayon. I then lightly misted the stamp and stamped it on a piece of Naturals White cardstock. I laid this aside for it to dry a little while I worked on another part of the card then came back to it. Using my Stamp-A-Ma-Jig, I stamped the sketch lines in Basic Brown over the flower. I "clipped" one lower corner with the Eyelet Border Punch, layered it on a Chocolate Chip piece and added a pink rhinestone brad to the corner. A small bit of Kiwi Kiss underneath adds just a touch of needed green accent.A piece of Pink Pirouette cardstock was stamped with Pink Pirouette using the single bloom stamp; it's very subtle and you can barely see it in the photo. The Eyelet punch adds a lovely bottom edge and shows up so well when the pink was layered onto a card base of Chocolate Chip. Pink grosgrain was tied around the pink before adding the image layers.
Stamps: Heartfelt Thanks
Inks: Basic Brown, Pink Pirouette
Paper: Chocolate Chip, Pink Pirouette, Naturals White, Kiwi Kiss
Tools: Eyelet Border Punch, Stamp-A-Ma-Jig, Aqua Painter, Water Mister
Accessories: Pink Pirouette Striped Grosgrain Ribbon, Fire Round Rhinestone Brad (pink)
I designed this for a Make n Take at a workshop a few days ago and I also needed a birthday card for my granddaughter, so I used that sentiment inside. I hope she will enjoy this card as much as I enjoyed making it! : )
Thanks for dropping by today! I always appreciate your visits and comments!
Have a great day; have fun stampin'!
Margaret
Subscribe to:
Posts (Atom)


