Showing posts with label 3-D. Show all posts

Monday, October 13, 2014

What's Special About October?

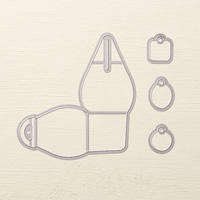
It's Breast Cancer Awareness Month, that's what!  Time to get our check-ups if we haven't had one recently, be aware of signs, symptoms and what to do!  To help raise awareness, I made this little reminder with Stampin' Up!'s wildly popular Curvy Keepsake Box Thinlit Die!  (that's quite a title, isn't it!)
 

I used a Heart Framelit to cut out the Melon Mambo DSP, then cut the thin straps with my paper trimmer and adhered all with Mono Multi Liquid Glue (the tape adhesive doesn't hold it well because of the curvy shape of the box).


I found this sentiment in the Something to Say set and love it for this theme!  The little flower in the front is from the same set.  The butterfly is encrusted with Dazzling Diamonds; this combined with the Pearls and flower makes for quite the feminine look!

I didn't take a picture of the box back but I made a remembrance "ribbon" out of Melon Mambo cardstock to emphasize the Breast Cancer Awareness theme of the box.
 
Stamps:  Something to Say, Papillon Potpourri
Inks:  Melon Mambo, Basic Black, Pink Pirouette
Paper:  Melon Mambo print from Brights DSP Stack; Pink Pirouette, Whisper White cardstocks
Accessories:  Designer Label Punch, flower punch from Itty Bitty Accents Punch Pack, Strawberry Slush Baker's Twine, Heart Framelits, Big Shot, Glue Pen, Dazzling Diamonds Glitter, Stampin' Sponge.

Lynn Starzyl made a box for breast cancer awarenes which inspired me to come up with one of my own.  Thanks, Lynn.

Remember the special annual October Breast Cancer Project at Splitcoast Stampers of making cards for breast cancer patients at M.D. Anderson Cancer Center in Houston.  You might want to join in this meaningful cause! 

Thanks for visiting today!  Take care of yourself, friends!

 Margaret


Saturday, October 11, 2014

ARE YOU READY FOR SOME FOOTBALL?

Well, it's Saturday so lots of college football games in the U.S. today!  I used my Curvy Keepsake Box Framelit to make these little treat boxes and decorated them for each of our large universities in Oklahoma; both are playing today!


The Oklahoma State University Cowboys are orange, black and white.  The cowboy hat was colored in dark gray (Basic Gray) even though it has a real blue-ish cast in the picture.  Go Pokes!


The University of Oklahoma is the Sooners.  I used Cherry Cobbler which is perfect for their crimson color.  The letters were diecut with the Little Letters Framelits.  Boomer Sooner!

I made both of these so that they can be opened to retrieve the treats inside.  The flap can be carefully lifted over the OU letters to open it; the Cowboy hat was cut out leaving a v-shaped flap on the bottom so it can be inserted down between the top flaps of the box and easily removed.

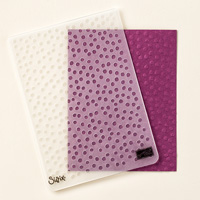
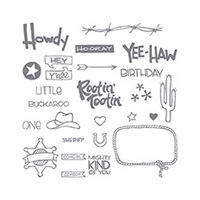
Other:  Little Letters Framelits, 2.5" Circle Punch, Decorative Dots TIEF, Paper Snips, Personal Paper Trimmer, Big Shot Die-Cutting Machine.  Cowboy hat from the YeeHaw set.

I just love this Curvy Keepsake Box Framelit!  I've seen so many creative ways stampers have decorated this box... it seems the variations are endless!   And the box itself is so easy to make it's ridiculous!

Hope you enjoy your weekend, football or not!  Happy Stamping!

Happy stamping!

Margaret


Friday, October 3, 2014

Curvy Keepsake Box Cuties!

Have you tried the new Curvy Keepsake Box Thinlit Die?  I bought it but didn't use it right away; when I did, I was surprised at how easy and FUN it is to use!  Addictive even?  lol!  Here are a couple of the first ones I made:


A pumpkin of course... after all, it's fall!  Pumpkin Pie cardstock stamped with Tangerine Tango ink using a stamp from the Work of Art set.  Pear Pizzazz ribbon, Old Olive leaf, curlycue and baker's twine.  Autumn Elements leaf too!  So simple! 


This little penguin makes me think of Happy Feet : )  Box in black decorated with punches:  Modern Label, Large Oval and Owl Builder Punch. 


The tag of Dazzling Diamonds Glimmer Paper was cut with a framelit that comes with the Curvy Keepsake Box Framelit and is adorned with an All is Calm Snowflake.  So fun and easy!  I can't wait to make more for Christmas treats, ornaments or gift holders!

Have a good weekend!  Happy Stamping!

Margaret

Thursday, November 8, 2012

Joyous Celebrations Candy Wrapper Treat Boxes!

It's still fall, I love Thanksgiving time yet I'm thinking ahead to Christmas these days!  How about you? Working on those Christmas cards yet?  Me too, but I took some time out to make these fun Candy Wrapper boxes recently.
The treat boxes were diecut with the Big Shot diecutting machine and the Stampin' Up! Candy Wrapper Bigz L Die!  They don't take that much cardstock; you can get two out of a 8.5" x 11" sheet of cardstock, and have a nice almost 2.5" x 11" piece left to use for punches and other things!
I used the Festival of Prints Designer Paper Pack to embellish my treat boxes.  I cut a 1.5"x 6" strip from the 4.5"x 6" sheet for the wrap.  This means you can get three "wraps" out of one sheet from the pack!  Nice!  And, these sheets are double-sided so you could use the other side for a totally different look!
For the sentiment on each Candy Wrapper, I realized that the Joyous Celebrations set from the 2012 Holiday Catalog would be a great fit!  I've used punches and the beautiful Champagne Glimmer Paper (again from the Holiday Catalog) to embellish each box.
The "Dec. 25" wrapper was tied with 3/8" Ruffled Ribbon in Lucky Limeade to coordinate with the DSP.  The other two were tied with (retired) Cherry Cobbler Ribbon (from 2011 Holiday Catalog) which I still have (and love);  Cherry Cobbler Seam Binding Ribbon would work just as well!
Here is another view of all three of the boxes together.  

Thanks for dropping by!  I hope you've enjoyed them!  Hmm, I have another vision for these dancing in my head so stay tuned; hopefully I'll have time to get that down on cardstock soon!

Margaret 
 

Festival of Prints    (c)Stampin' Up! 2012     #126904     $6.95
Candy Wrapper Bigz L Die  (c)Stampin' Up!    #120890     $32.95

Tuesday, April 10, 2012

Pretty Up Your Paperwork!

I needed a little gift for a fellow demo; hmm, what to make?  Then my eyes landed on these bright green binder clips I had purchased a while back.  I thought "why not decorate these and make them brighten up the drudgery of paperwork a little"?! (can you tell I've been working on taxes, lol?!)  So I got out some Designer Paper and some of my trusty Stampin' Up! punches and went to work!


The Designer Paper was from various assortments, some current, some retired.  I just went with it.  The Scallop Oval Punch was used for the large piece that went all the way from front to back of the clip.  I ran this through my Xyron machine in order to assure a lasting adhesion.  Sticky Strip could be used successfully also.  Basic Pearls and Rhinestones of various sizes embellish the clips.

These clips were fun and a little different than my usual thing.  They are a "small" project but I wanted to share them with you!  I'll be making more of these.

Craft away, friends!


Margaret

Wednesday, October 19, 2011

"FALL" Home Decor Wall Hanging

Today's share is a wall hanging celebrating Fall made almost entirely with the Big Shot and die cuts.  I love all the colors in these papers, and especially the not-so-common use of blue in the designer paper for a fall project! (I'm a lifelong fan of blues of any shade!)   : )

As you can see, almost everything on here was die cut with the Big Shot and the leaves were all texturized with the Big Shot and Embossing Folders.  Only the buttons and four small flowers were not die cut; however the flowers were punched out, so.... no hand cutting here!  That sure speeds up the construction!
Here is a close-up of the first square; this is die cut with the large Scallop Square Die that is about 4 3/8" square.  Designer Paper is the wonderful Well-Worn Designer Series Paper.  Every leaf was run through one of Stampin' Up!'s Embossing Folders to give it interesting texture.  The entire hanging is about 26" long from top to tip.  I'm enjoying it in my breakfast room this season!

Thanks for looking and visiting today!

Margaret

Friday, September 23, 2011

Treat Bags! (No Tricks)

Happy Friday!  Today I have some fun Treat Bags for you made with Stampin' Up!'s new 1 x 8" Cellophane Bags from the Holiday Mini Catalog and some punches and die cuts!  

I made five of these but realized I just photographed these two; each I made is a little different.  For the topper on the left, I used the a stamp from Grateful Greetings and colored the words with various Stampin' Write Markers before stamping on Daffodil Delight cardstock.  I used the Scalloped Square Duo die and the Tangerine Tango back is diecut with the larger circle on the Perfect Pennant Die new in the 2011-12 Catalog.

The topper on the right begins with the cute pumpkin "Got Treats?" stamp from the set of the same name.  The Scallop Circle Punch and the 2" circle on the Circles #2 Die were also used.  The frizzies on the top are simply short pieces of 1/4" grosgrain ribbon that have been "frizzed" by cutting off one woven edge of the ribbon then pulling out the crosswise threads.  I attached this with Snail adhesive.  I did use Sticky Strip to adhere the bags to the toppers because it is strong and will hold the weight of candy or whatever you fill the bag with.

Pull out your trick or treat stamps, your favorite color cardstock, punches and diecuts!  Punch, layer, stamp and just have fun coming up with your toppers for treat bags for little (and big) goblins!  Then fill with your favorite yummies for gifting!  Then start thinking what other holidays you can make some treat gifts, like Christmas, Valentine, Easter....!  Hmmm!

Cellophane Bags, #124134, 50 per pkg., page 11, Holiday Mini Catalog, $2.50.

Got Treats, set of 10:  #119114 $24.95 (w); #120627 $17.95 (c), pg. 10, IB&C.

Grateful Greetings, set of 12: #116511, $36.95, pg. 27, IB&C

Perfect Pennants Die, #123126, pg. 221, IB&C, $32.95

You are invited to order any of these or other Stampin' Up! product from my official Stampin' Up! website if you don't already have a local demonstrator; your order will be shipped directly to you by Stampin' Up! and UPS!

Thanks for visiting today!  Have a great weekend!

Margaret

Friday, September 9, 2011

Another Lolly: Island Indigo and Paisley Petals DSP

Today's post is another lolly that I made using my wonderful new Simply Scored tool from Stampin' Up!  This lolly is made using our scrumptious new Island Indigo (new In Color for 2011-2013) cardstock and the Paisley Petals DSP!

This lolly is 4 1/2" in diameter.  I used two 2 1/8" strips of Island Indigo cardstock, scoring them at 1/2".  The 12" Paisley Petals Designer Series Paper was cut into 2 - 1 1/4" strips, also scored at 1/2".  Too bad the Marina Mist and Pear Pizzazz colors in the DSP don't show up very well in the picture; mostly just the Soft Suede is showing, but the papers really look nice together IRL.


For the center I punched a Scallop Circle from Pear Pizzazz, embossed it with the Big Shot and the Petals A Plenty Embossing Folder and added an Island Indigo flower punched with the Boho Blossoms punch.  I added a retired button which really coordinated well!  A bamboo skewer with Sticky Strip on the pointed end is inserted for a stem and a swash of 1-1/4" wide Striped Grosgrain Ribbon decorates it.


I used 1 1/2" squares cut from Sticky Sheets (formerly called Sticky Pages) on the punched circles in between the pleated layers.  TIP:  You MUST very firmly burnish the Sticky Sheet adhesive to the surfaces in order to activate it so that it will hold.  Other options might be Sticky Strip, Dimensionals or perhaps hot glue (I haven't used that myself). 

These lollies can be used for so many things:  stick one or several in a dried or silk flower arrangement; put one in a vase with a tag and take to a sick friend or shut-in.  Put one on the front of a card or mini-album (without the stem, of course!!) or make a wreath such as the one shown on page 6 of the Holiday Mini Catalog!  They are fun and easy to make using the Simply Scored tool (pg. 6-7 in the Holiday Mini, which you are going to just LOVE!)!!

Our prayers go out to all those who lost loved ones in the 9-11 attack, to those who have lost loved ones and property in the hurricanes, floods and fires.  May God give you strength and peace and keep you in the hollow of His hand.

Thanks for dropping by today!   Wishing you a wonderful and safe weekend.

Margaret

Thursday, September 8, 2011

Simply Scored Lolly!

Have you noticed all the beautifully scored papercraft projects in the Stampin' Up! 2010-2011 Idea Book and Catalog and the Holiday Mini Catalog (pg. 6 and 20)?  That would be because Stampin' Up! now has a fabulous scoring tool called "Simply Scored"!!  (It's in the Holiday Mini, pgs. 6 and 7.)  It makes scoring your cards, papers, boxes and any other papers a breeze.  I have mine already and I love it!  You need this!

Paper "Lollies" are a big trend in papercrafting currently.  Here is one I made and taught for a Make & Take at a recent demonstrators meeting!  Everyone seemed to love it and were glad to learn how to make them!  They are such fun!


I used the lovely Paisley Petals Designer Paper and Marina Mist cardstock for the Lolly with a little Calypso Coral and Not Quite Navy in the center.  Other products used are the Simply Scored Tool, Boho Blossoms Punch, 1" Circle Punch, Scalloped Circles #2 Die, Pear Pizzazz Seam Binding Ribbon, Sticky Sheets, Dimensionals, Antique Brads and a 1/4" diameter bamboo skewer found at the grocery store.

Here is a picture showing the above lolly and two others I've made.
The Simply Scored tool includes a storage compartment, a stylus (much better than a bone folder and doesn't tear your paper), plus insertable markers which are a terrific aid in your scoring, especially when making more than one of any project!   You can learn more about the Simply Scored Tool here. 
(c) Stampin' Up! 1990-2011
 If you don't have a Stampin' Up! Demonstrator, I'd be thrilled for you to order through my Stampin' Up! website HERE.  Your order will be delivered right to your door by UPS!!  And remember, for any order $150 and over, you earn free money to spend on items of your choice in the catalogs, hostess sets included!!  Wonderful!!

Thanks for visiting today!  You presence is appreciated and I love to read your comments!

Enjoy!

Margaret

Thursday, June 30, 2011

Perfect Setting Die: Cupcake Gifts

Just a few more hours to go and the Perfect Setting die for the Big Shot will be retired!  This makes me sad because it makes the cutest paper cups into which you can set your cupcakes!  It also does much more!!
For our recent stamping retreat, we (the planning team) made about fifty-four of these as "pillow gifts" for those who stayed at the hotel on Friday night.  I cut these all out of the current In Colors cardstock, punched out the "lids" from White cardstock and the largest circle punch.  Then Jann, Connie, Leslie and I all worked on them: gathering ribbon, hot gluing, attaching lids, etc., and also helping Jann make the little pins which were placed inside the cupcakes!  We were busy bees!
 Here's the box we were putting the completed cupcake gifts into for distributing to the guests' rooms.  They all looked so pretty together!


The above picture shows how the diecuts from the Perfect Setting Die look.  These can be used for many other projects besides these also!

I ran all the ones for the retreat as well as this one through the Big Shot with a Textured Impressions Embossing Folder to give it even more cuteness!  : )  What fun these cupcake holders  would be to present your delicious cupcakes for a party, luncheon or any celebration and impress your guests!


#115961 Perfect Setting Die, reg. $42.95, currently discounted 40% to $25.77!  A real deal in my book!  : )  Available until midnight tonight (MT), June 30, 2011.
Any Stampin' Up! products can be purchased online through my Stampin' Up! Demonstrator website and Online Store HERE!  Orders will be shipped directly to you from Stampin' Up!

Thanks for visiting today!  Hope you get everything you need from the retiring catalog and have a great weekend with family and friends celebrating our freedoms!

God Bless America and our wonderful military personnel and families!
Margaret

Related Posts Plugin for WordPress, Blogger...