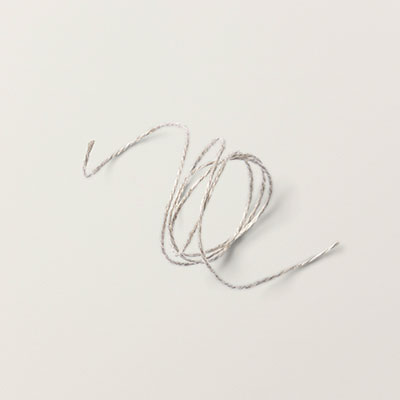
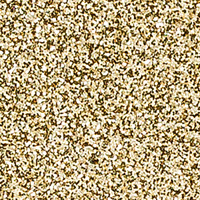
This week at Create with Connie and Mary we have a beautiful Color Challenge: use Whisper White, Silver Glimmer and Cherry Cobbler for your project!
Here's my card and what I did:
- Fold 8.5" x 5.5" in half for card base.
- Cut a 5.5" x 4.25" layer of Whisper White.
- Diecut Whisper White with the Darling Doily Thinlit, diecut Cherry Cobbler DSP with the largest Banner Framelit and Silver Glimmer Paper with a smaller Banner Framelit. Attach to White background as shown above.
- Wrap Cherry Cobbler Seam Binding Ribbon around top of Whisper White/doily/banner layer and adhere to back; cut a short length for tie. Adhere the entire layer onto the Cherry Cobbler card base.
- Stamp "merry" with Cherry Cobbler ink and cut flags on both ends. Attach with Dimensionals. Stamp greeting inside.
Stamps: Good Greetings
Ink: Cherry Cobbler
Paper: Cherry Cobbler, Whisper White, Silver Glimmer Paper, Trim the Tree DSP Stack
Accessories: Banners Framelits, Darling Doily Thinlits Die, Big Shot, Magnetic Platform, Paper Snips, Thinestones, Cherry Cobbler Seam Binding Ribbon.
Here is the Color Challenge for this week:
You may see more cards made by the very creative CCMC Challenge Team on the Create with Connie and Mary website. We would love for you to make a card using this sketch and join us for the challenge this week! Check the guidelines that are on the Create with Connie and Mary website for participation!
Wishing you a wonderful Christmas season this year!
Margaret
This week at Create with Connie and Mary we have a cool sketch for this week's challenge CCM333! These tilted-angle lines are currently so trendy in papercrafting; it's fun to see what we can do with them on this clean and simple sketch!
I used two Pear Pizzazz prints for the backgrounds and jazzed it up with Dazzling Diamonds Glimmer Paper behind the front layer and also for one of the trees, Mossy Meadow cardstock stamped with Encore Silver ink for another tree and a Cherry Cobbler print for the third.
Because this set is photopolymer I was able to curve the sentiment to match a Bitty Banners Framelit to give it a little bit different look. Rhinestones and a Glimmer Paper star decorate the trees. This is a pretty simple and easily replicated layout that would lend itself to making multiples!
Stamps: Festival of Trees
Inks: Silver Encore, Cherry Cobbler ink
Paper: Festival of Trees DSP Stack; Dazzling Diamonds Glimmer Paper, Mossy Meadow and Whisper White cardstocks.
Accessories: Tree Punch, Bitty Banners Framelits, Rhinestones, Ribbon
Here is the CCMC333 sketch we used this week:
You can see more cards made by the very creative CCMC Challenge Team on the Create with Connie and Mary website. We would love for you to make a card using this sketch and join us for the challenge this week! Check the guidelines that are on the Create with Connie and Mary website for participation!
Thanks for visiting us this week!! Try to take just a little time for yourself during the busy-ness of this holiday season!
Margaret
Happy Day before Thanksgiving! I have my last fall creations to share today: a card and a Curvy Keepsake box all decorated for sharing your gratitude!
Stamps: Merry Everything (Grateful for You - Tag), For All Things (leaf and oval grateful sentiment)
Inks: Soft Suede, Blackberry Bliss
Paper: Crumb Cake, Mossy Meadow, Blackberry Bliss, Tangelo Twist, Gold Glimmer Paper
Accessories: Autumn Accents die (diecuts), Burlap Ribbon, Note Tag Punch, Curvy Keepsake Box Thinlit, Big Shot, Woodgrain Embossing Folder, Large Oval Punch, Dimensionals, Glue Dots.
Thanks for dropping by today! I want you to know that I am very thankful for your visits, comments and encouragement as we share our enjoyment of stamping and papercrafting!
Have a lovely holiday!
Margaret
Are you working on your Christmas cards? I'm making some as I go these days. Here's one that is super quick and easy and easy to replicate using the lovely Christmas Cheer set in the 2014 Holiday Catalog.
Yes, if you look in the 2014 Holiday Catalog you will see not only this set, but also this card (and two other sample using this set! The Stampin' Up! catalogs have hundreds of samples using the stamps in the catalogs; it's a great resource for ideas and project layouts too! I basically copied this card; how easy is that! And... just one stamp, Christmas Cheer, one Mossy Meadow inkpad and one Filagree Frame Textured Impressions Embossing Folder... Viola! Done! Oh, I did color five Rhinestones with a Cherry Cobbler Blendability marker and added them for some sparkle! : ) (note: the catalog sample was stamped in gold; I used Mossy Meadow ink instead)
You can see the 2014 Holiday Catalog online by clicking HERE.
Stampin' Up! has just released a 2014 Holiday Supplement filled with quick and easy project ideas which will be really useful for your gifting, card-sending and home decor needs! Click HERE to see it!
Thanks for looking! Hope you enjoy your weekend!
Margaret
Oh, we have such a pretty Color Challenge today at Create with Connie and Mary! The trio of Lost Lagoon, Mossy Meadow and Silver is such a beautiful combination! I also used touches of white for my neutral.
I inked the tinsel stamp with silver ink then stamped on Mossy Meadow; with a different tree inked with silver I stamped twice on Lost Lagoon (both stamps are from the Festival of Trees set). These were then punched them out with the Tree Punch. I cut the silver dotted paper with an Oval Framelit and adhered it to the Mossy Meadow card base, then placed torn Brushed Silver cardstock over the lower portion.
Next a layer of Lost Lagoon was diecut with the fifth largest (counting up from the smallest one) Oval Framelit, embossed with the Filigree Frame TIEF and adhered with Dimensionals over the dotted white DSP layer, framing the background. The sentiment from this set was stamped onto Whisper White, layered over a bit of Mossy Meadow Ribbon then adhered with Dimensionals.
Lastly I added several silver and snowflake sequins from the Frosted Sequins pack to complete the card..
Stamps: Festival of Trees
Ink: Encore Silver, Mossy Meadow
Paper: Lost Lagoon, Mossy Meadow, Whisper White cardstock. All is Calm DSP
Accessories: Tree Punch, Frosted Sequins Embellishments pack, Glue Dots, Filigree Frames Embossing Folder, Oval Framelits, Mossy Meadow Stitched Satin Ribbon, Big Shot.
 Isn't this a beautiful color combo? And if you have the All is Calm DSP, you already have a head start on joining the challenge this week too, since these colors are in it! So take a little time to come up with your own creation following the guidelines over at Create with Connie and Mary and join the fun!
While you're there, be sure to see what the other Designers Team members have created for this challenge too... they ARE creative!!
Thanks for visiting this week! Come back soon for more stamping fun and hopefully, inspiration!
Happy Stamping!
Margaret
Another card with my current favorite set, Four Feathers! Each feather is stamped onto a different color block stamped with a Work of Art stamp. Gorgeous Grunge stamped across the card vertically. "Yippee" is from the new YeeHaw photopolymer set.
The Gold Button and Gold Baker's Twine seemed a perfect fit with these colors and I wanted to add just a bit more sparkle but Rhinestones, even though I love them, just didn't work for me here. Sooo, I took some Gold Glitz Dazzling Details and used my palette knife to smoosh (a technical term, I'm sure) just a small amount onto the Hello Honey and the Tangelo Twist blocks. Hard to see in the pictures but a little sparkly in person. : )
If you look carefully you can see the gold glitz...
That's about it. It was pretty easy and would have been fairly quick if I hadn't had to lay it aside for a couple of weeks and do other things before finishing it! lol!
Thanks for visiting! Have a stampin' good day!
Margaret
Happy Sunday! Hope your weekend has been good! I have two cards for you today, both using the Seasonally Scattered set that is in the current Holiday Catalog. I am using the Thanks stamp with all the vines and leaves. I use the "baby wipe" technique on both of the focal images with inks of Mossy Meadow, Blackberry Bliss, Tangelo Twist and Island Indigo (those are the main ones... I may have thrown in a few more but it's been a couple of weeks since I stamped these images!)
The card base is Blackberry Bliss with a layer of Crumb Cake that was stamped with the Hardwood set in the same color. A length of Island Indigo Chevron Ribbon is wrapped around and anchored at the top with a Regals Collection button tied with Linen Thread. The focal piece is layered on Tangelo Twist cardstock and a couple of leaves cut with the Fun Fall Framelits were added to the corners.
The second card is on an Old Olive card base layered with Blackberry Bliss cardstock embossed with the Fancy Fan TIEF. then bound with a length of Lost Lagoon Stitched Satin Ribbon. Rhinestones colored with Blendabilities embellish both the image and the Gold Glimmer Paper punch accents.
The backgrounds do make a difference in the way these images look, don't they! If you haven't tried the baby wipe technique, it is fun and easy. Just take a moist baby wipe or two, lay them on a plate that won't stain and using your ink refills, place several drops of each ink together around on the wipe then use this as your "ink pad". Experiment with it until you find the combination you want. I always stamp multiples or perhaps stamp several images using this ink pad until it begins to stamp too light. At that point my options are: (1) re-ink (if I can tell where the colors are), (2) fold in half and pull the baby wipe across white or light-colored cardstock to make backgrounds (you might want to use craft or rubber gloves for this unless you want inky fingers) or (3) just throw it away. Try it, experiment and have fun!
Thanks for visiting today! Happy Stamping!
Margaret