Hello and happy Thursday! We have another fun challenge today from Create with Connie and Mary: bold colors!! This week we use Pacific Point, Tangerine Tango and Cucumber Crush for our challenge card. It really took me awhile to think how to use these together; I discarded several ideas before deciding on this design using the new Greetings Thinlits.
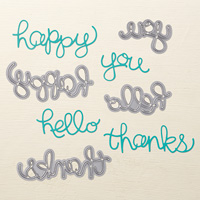
I'm really liking this new set of Framelits with their scripty words: hello, thanks, cheers. Can't you just think of so many ways to use them?! I diecut one "cheers" from each of the three challenge colors and layered them onto a Whisper White background dry embossed with the Lucky Stars embossing folder.
Next I made a banner of the Cucumber Crush print, treating the end with the Scalloped Tag Punch and adding underlays of Tangerine and Pacific. Next came the stars: I punched out the Tangerine star with the new Medium Star punch and added a diecut star of Dazzling Diamonds Glimmer Paper which was on my desk, an extra from a previous project. The Rhinestone was colored with a Sharpie pen.
The card base is Pacific Point with a layer of the Cucumber Print added. The embossed white layer was added with Dimensionals. Two more Glimmer Paper stars finish the card, except for the inside where I added a strip of Cucumber print and another glimmer star.
Isn't this a fun color scheme from Create with Connie and Mary this week?
Now it's your turn to create! Check out the cards of the other Challenge Team over on the Create with Connie and Mary blog and see their creative ideas, then join us in this challenge!! These bright colors are perfect for a summertime project!
Thanks for visiting! Happy Thursday!
Margaret
Showing posts with label Framelits. Show all posts
Thursday, August 13, 2015
Thursday, May 21, 2015
Butterfly Sympathy CCMC356
We have a lovely color combination today from Create with Connie and Mary for Color Challenge CCMC356: Blackberry Bliss, Soft Sky and Silver or Smoky Slate.
I used a Blackberry Bliss card base with bottom front corners rounded and heat embossed the sentiment with Silver Embossing Powder. Next, with Dimensionals I added a layer of Soft Sky that has been embossed with the Spring Flowers embossing folder.
Over that is layered a 4" x 1" strip of a Blackberry Bliss print paper.
A diecut Butterfly and three small punched flowers, all from Brushed Silver Cardstock and embellished with Basic Pearls, complete the card.
Stamps: Bloom with Hope (sentiment)
Ink: VersaMark
Paper: Park Lane Designer Paper; Blackberry Bliss, Soft Sky, Brushed Silver cardstocks
Accessories: Silver Embossing Powder, Basic Pearls
Tools: Heat Tool, Butterfly Framelits, Spring Flowers TIEF, Big Shot, Itty Bitty Accents Punch Pack
Here's the Create with Connie and Mary Color Challenge for this week:
What do you think? We would love for you to join us this week by creating with these colors then posting it to the Create with Connie and Mary website (all the guidelines are there for you). Can't wait to see what you do with this challenge!
Thanks for visiting today! Happy Stampin'!
Margaret
I used a Blackberry Bliss card base with bottom front corners rounded and heat embossed the sentiment with Silver Embossing Powder. Next, with Dimensionals I added a layer of Soft Sky that has been embossed with the Spring Flowers embossing folder.
Over that is layered a 4" x 1" strip of a Blackberry Bliss print paper.
A diecut Butterfly and three small punched flowers, all from Brushed Silver Cardstock and embellished with Basic Pearls, complete the card.
Stamps: Bloom with Hope (sentiment)
Ink: VersaMark
Paper: Park Lane Designer Paper; Blackberry Bliss, Soft Sky, Brushed Silver cardstocks
Accessories: Silver Embossing Powder, Basic Pearls
Tools: Heat Tool, Butterfly Framelits, Spring Flowers TIEF, Big Shot, Itty Bitty Accents Punch Pack
Here's the Create with Connie and Mary Color Challenge for this week:
What do you think? We would love for you to join us this week by creating with these colors then posting it to the Create with Connie and Mary website (all the guidelines are there for you). Can't wait to see what you do with this challenge!
Thanks for visiting today! Happy Stampin'!
Margaret
Thursday, April 2, 2015
Sketch Challenge CCMC349
Thursday is here and it's time for the Create with Connie and Mary Challenge; this week we have a color scheme to play with! I experimented with several stamps for the focal image but ended up using the Four Feathers set for my card.
The smaller feather was stamped in Calypso Coral onto Whisper White and the larger one with Basic Gray onto Pool Party cardstock, then I die cut them with the Feathers Framelits. The Designer Paper is from the Sweet Dreams Collection.
The sentiment is stamped in Basic Gray. You might can see on the Lost Lagoon background a slight chevron pattern; this is a technique I used on a card I posted several month ago where you put your card stock into the embossing folder, lay it on a firm rubber mat then lay another sheet of cardstock of that. Next, using a rubber mallet, pound (not too hard) to transfer the pattern of the folder to the cardstock. The rubber mat I used is a retired SU Crease Pad that we sold several years ago, but you wouldn't have to have one. You could just place the embossing folder on a magazine or phone book before hammering. This technique gives a more subtle texture to your cardstock.
Stamps: Four Feathers, A Dozen Thoughts
Inks: Calypso Coral, Basic Gray
Paper: Sweet Dreams Designer Series Paper
Accessories: Feathers Framelits, Big Shot, Silver Mini Brads
Here is the challenge this week:
This is a very cool challenge and is perfect for your spring flowers too! However I took artistic license and went a different direction than flowers this week! The Challenge Team has made some beautiful cards for you this week on the Create with Connie and Mary blog... jump right over there to see them and be inspired to make your own creation using this color scheme! We can't wait to see what you do with the sketch!
Happy Stampin'!
Margaret
The smaller feather was stamped in Calypso Coral onto Whisper White and the larger one with Basic Gray onto Pool Party cardstock, then I die cut them with the Feathers Framelits. The Designer Paper is from the Sweet Dreams Collection.
The sentiment is stamped in Basic Gray. You might can see on the Lost Lagoon background a slight chevron pattern; this is a technique I used on a card I posted several month ago where you put your card stock into the embossing folder, lay it on a firm rubber mat then lay another sheet of cardstock of that. Next, using a rubber mallet, pound (not too hard) to transfer the pattern of the folder to the cardstock. The rubber mat I used is a retired SU Crease Pad that we sold several years ago, but you wouldn't have to have one. You could just place the embossing folder on a magazine or phone book before hammering. This technique gives a more subtle texture to your cardstock.
Stamps: Four Feathers, A Dozen Thoughts
Inks: Calypso Coral, Basic Gray
Paper: Sweet Dreams Designer Series Paper
Accessories: Feathers Framelits, Big Shot, Silver Mini Brads
Here is the challenge this week:
This is a very cool challenge and is perfect for your spring flowers too! However I took artistic license and went a different direction than flowers this week! The Challenge Team has made some beautiful cards for you this week on the Create with Connie and Mary blog... jump right over there to see them and be inspired to make your own creation using this color scheme! We can't wait to see what you do with the sketch!
Happy Stampin'!
Margaret
Thursday, March 12, 2015
Happy Thinlits! CCMC346
It's Create with Connie and Mary Challenge Day and this week we have a COLOR scheme using Wild Wasabi, Sahara Sand and Basic Black! Fun colors to create with!
"Happy" was diecut from Wild Wasabi cardstock and adhered with my Two-Way Glue Pen. The flower is made with three flowers, one punched from Wild Wasabi DSP and one from the Typeset Specialty with the Pansy Punch then one smaller punched from the Typeset Specialty with the Petite Petals Punch and centered with a Pearl.
In this picture you can see the texture and more details up close, including the butterfly punched out with the Bitty Butterfly punch.
Stamps: Remembering Your Birthday (inside)
Inks: Wild Wasabi
Paper: Basic Black, Sahara Sand, Wild Wasabi cardstocks; Stacked with Love DSP (black tiny hearts), Regals DSP Pack (Wild Wasabi dots), Typeset Specialty DSP
Accessories: Basic Pearls, Glue Dots
Tools: Hello You Framelits ("happy"), On Film Framelits, Pansy Punch, Petite Petals Punch, Bitty Butterfly Punch, Bird Builder Punch (leaf stem), Big Shot, Magnetic Cutting Platform, Polka Dot embossing folder (TIEF), Two Way Glue Pen.
Here again is the color scheme for the Create with Connie and Mary Challenge this week:
We are hoping you will join us for the fun of creating with this color scheme! It's a great one for the up-coming St. Patrick's Day or for Spring (which we hope is coming SOON! : ) Just check out the guidelines over at the Create with Connie and Mary blog then get to your creative spot and jump in! We can't wait to see what you make!
While you're there, check out the wonderful cards from all of our Thursday Challenge Team!! We have five gifted new members and you'll love their beautiful work! Four former members have moved to the CCMC Saturday Blog Hop and you can find them "hopping" every Saturday!
Thanks for visiting today! Happy Stamping!
Margaret
I cut the Sahara Sand with the On Film Framelits, added a polka-dot embossed black panel behind the opening and adhered it all to the tiny black hearts DSP. The base card is Wild Wasabi, 4.25" x 11", folded in half.
Stamps: Remembering Your Birthday (inside)
Inks: Wild Wasabi
Paper: Basic Black, Sahara Sand, Wild Wasabi cardstocks; Stacked with Love DSP (black tiny hearts), Regals DSP Pack (Wild Wasabi dots), Typeset Specialty DSP
Accessories: Basic Pearls, Glue Dots
Tools: Hello You Framelits ("happy"), On Film Framelits, Pansy Punch, Petite Petals Punch, Bitty Butterfly Punch, Bird Builder Punch (leaf stem), Big Shot, Magnetic Cutting Platform, Polka Dot embossing folder (TIEF), Two Way Glue Pen.
Here again is the color scheme for the Create with Connie and Mary Challenge this week:
We are hoping you will join us for the fun of creating with this color scheme! It's a great one for the up-coming St. Patrick's Day or for Spring (which we hope is coming SOON! : ) Just check out the guidelines over at the Create with Connie and Mary blog then get to your creative spot and jump in! We can't wait to see what you make!
While you're there, check out the wonderful cards from all of our Thursday Challenge Team!! We have five gifted new members and you'll love their beautiful work! Four former members have moved to the CCMC Saturday Blog Hop and you can find them "hopping" every Saturday!
Thanks for visiting today! Happy Stamping!
Margaret
Thursday, March 5, 2015
Celebrate Today! CCMC345
How about some blue skies today? We've have so many days of grey and white (it's snowing as I write this) that this Designer Paper looks really good to me! I'm ready for blue skies and sunshine as I know many of you in North America must be also! Today is a super Sketch Challenge from Create with Connie and Mary, #CCMC345.
I broke out my Celebrate Today set for this challenge as the circles on the sketch immediately made me think of these fun balloons! I diecut the Daffodil Delight and Bermuda Bay balloons with the Balloon Framelits then punched out the Rose Red dsp dotted balloon. I used the Rose Red Crochet Trim from the Artisan Designer Kit for the diagonal band and added a Petite Petal flower punched from Bermuda Bay DSP. The flower center and little bow are both Dazzling Diamonds Glimmer Paper for some bling! The banner stamp was colored with markers then diecut with its corresponding framelit.
Stamps: Celebrate Today
Ink: Bermuda Bay pad, Bermuda Bay and Rose Red Stampin' Write Markers
Paper: Whisper White, Daffodil Delight cardstocks; Brights and Regals Designer Series Packs; Sweet Dreams DSP (clouds) and Painted Blooms DSP (Rose Red dots); Dazzling Diamonds Glimmer Paper
Accessories: Artisan Embellishment Kit; Balloons Framelits. 2" and 1/4" Circle Punch, Petite Petals Punch, Flower Punch from the Itty Bitty Accents Punch Pack.
Here is the fun Sketch Challenge from Create with Connie and Mary this week:
Doesn't this look like a fun sketch? It is! We would love for you to join us this week by making a card using this sketch! All the guidelines are on the Create with Connie and Mary blog as well cards made by all the Challenge Team members! Come check them out also!
Thanks for visiting this week! Happy Stamping!
Margaret
I broke out my Celebrate Today set for this challenge as the circles on the sketch immediately made me think of these fun balloons! I diecut the Daffodil Delight and Bermuda Bay balloons with the Balloon Framelits then punched out the Rose Red dsp dotted balloon. I used the Rose Red Crochet Trim from the Artisan Designer Kit for the diagonal band and added a Petite Petal flower punched from Bermuda Bay DSP. The flower center and little bow are both Dazzling Diamonds Glimmer Paper for some bling! The banner stamp was colored with markers then diecut with its corresponding framelit.
Stamps: Celebrate Today
Ink: Bermuda Bay pad, Bermuda Bay and Rose Red Stampin' Write Markers
Paper: Whisper White, Daffodil Delight cardstocks; Brights and Regals Designer Series Packs; Sweet Dreams DSP (clouds) and Painted Blooms DSP (Rose Red dots); Dazzling Diamonds Glimmer Paper
Accessories: Artisan Embellishment Kit; Balloons Framelits. 2" and 1/4" Circle Punch, Petite Petals Punch, Flower Punch from the Itty Bitty Accents Punch Pack.
Here is the fun Sketch Challenge from Create with Connie and Mary this week:
Doesn't this look like a fun sketch? It is! We would love for you to join us this week by making a card using this sketch! All the guidelines are on the Create with Connie and Mary blog as well cards made by all the Challenge Team members! Come check them out also!
Thanks for visiting this week! Happy Stamping!
Margaret
Saturday, January 24, 2015
"Hello" Thinlit Card
Do you want a card that is simple and easy to make? I have one today using the Hello You Thinlits Dies in the new Occasions 2015 Catalog. This set of four thinlits contains the very usable words "hello", "you", "thanks" and "happy".
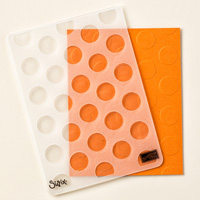
1. For card base, cut an 8.5" x 5.5" piece of Crisp Cantaloupe and fold in half. Using the Large Polka Dot Embossing Folder, emboss the lower half of the card front.
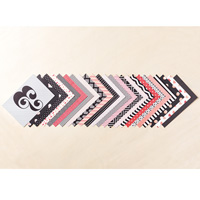
2. Cut a layer of Real Red at 3-3/8" x 5-1/8" and layer with a piece of designer paper cut to 3-1/4" x 5". Adhere this to the card base.
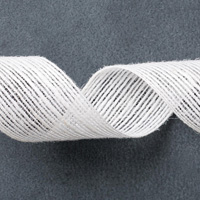
3. Cut a length of White Jute Ribbon to 5-3/16" long and "flag" the ends; adhere to designer paper (I used Glue Dots for this).
4. Using the 1/4" Circle Punch, punch only about 1/8" into top left of card (fold) to make an opening through which to thread the Cantaloupe Baker's Twine. Tie twine in bow.
5. Diecut "hello" from Crisp Cantaloupe cardstock (use wax paper between cardstock and thinlit to help release the diecut more easily) and layer on a Real Red layer diecut with the second from smallest Deco Label Framelit.
6. Add several Crisp Cantaloups sequins from the In Color Sequins collection.
Paper: Stacked With Love Paper Stack; Crisp Cantaloupe, Real Red
Accessories: In Color Sequins, Crisp Cantaloupe Baker's Twine, Hello You Thinlits Dies, White Jute Ribbon, Deco Label Framelits, Big Shot, 1/4" hand-held Circle Punch, Large Polka Dot TIEF.
You can use this card for any number of occasions! I plan to use this one for a thinking-of-you card for a friend.
Thanks for visiting today; drop by again soon!
Margaret
1. For card base, cut an 8.5" x 5.5" piece of Crisp Cantaloupe and fold in half. Using the Large Polka Dot Embossing Folder, emboss the lower half of the card front.
2. Cut a layer of Real Red at 3-3/8" x 5-1/8" and layer with a piece of designer paper cut to 3-1/4" x 5". Adhere this to the card base.
3. Cut a length of White Jute Ribbon to 5-3/16" long and "flag" the ends; adhere to designer paper (I used Glue Dots for this).
4. Using the 1/4" Circle Punch, punch only about 1/8" into top left of card (fold) to make an opening through which to thread the Cantaloupe Baker's Twine. Tie twine in bow.
5. Diecut "hello" from Crisp Cantaloupe cardstock (use wax paper between cardstock and thinlit to help release the diecut more easily) and layer on a Real Red layer diecut with the second from smallest Deco Label Framelit.
6. Add several Crisp Cantaloups sequins from the In Color Sequins collection.
Paper: Stacked With Love Paper Stack; Crisp Cantaloupe, Real Red
Accessories: In Color Sequins, Crisp Cantaloupe Baker's Twine, Hello You Thinlits Dies, White Jute Ribbon, Deco Label Framelits, Big Shot, 1/4" hand-held Circle Punch, Large Polka Dot TIEF.
You can use this card for any number of occasions! I plan to use this one for a thinking-of-you card for a friend.
Thanks for visiting today; drop by again soon!
Margaret
Thursday, November 20, 2014
Fall Fest! CCMC330
Hello! Today we have a very colorful combination for our Create with Connie and Mary Thursday Challenge! The In Colors of Hello Honey, Tangelo Twist and Blackberry Bliss make for a delicious creative combo! Yum!
I love these pumpkins from the Fall Fest set and the Fun Fall Framelits to die cut them in a snap! I thought I might be about to put them away to work on Christmas but they were just too perfect for these colors. I made a card that could be used for a personal thank you note or for a Thanksgiving card to let someone know how grateful you are for them.
The pumpkins were inked with Hello Honey then the edge sponged with Tangelo Twist before stamping. The "thanks" stamp was sponged in the center with Tangelo Twist then the edges with Blackberry Bliss; where the colors overlapped gave a lovely bronze-like color and when the pumpkins were added, you really don't even see the pure Tangelo Twist. Hmm. This layer was added to layers of Tangelo Twist and Hello Honey.
The "Thankful for" was diecut with the Bitty Banners and backed with a Blackberry Bliss diecut banner which was cut in half and added to the back. Some Blendability-colored Rhinestones add the final touch.
Stamps: Fall Fest (pumpkins), Seasonally Scattered (background), Truly Grateful (sentiment)
Inks: Hello Honey, Tangelo Twist, Blackberry Twist.
Papers: Moonlight DSP Stack; Hello Honey, Tangelo Twist, Blackberry Twist, Whisper White cardstocks
Accessories: Rhinestones, Fun Fall Framelits, Bitty Banner Framelits, Stampin' Sponges, Blackberry Bliss Ribbon
Here again is the Color Challenge from Create with Connie and Mary this week:
Be sure to check out the cards the other Challenge Design Team members made with these gorgeous colors! Just go to Create with Connie and Mary and while you're there also see the guidelines for joining us in this challenge! It's fun and also helpful to give one a starting place for a project!!
Thanks for visiting... and keep on stamping! : )
Margaret
I love these pumpkins from the Fall Fest set and the Fun Fall Framelits to die cut them in a snap! I thought I might be about to put them away to work on Christmas but they were just too perfect for these colors. I made a card that could be used for a personal thank you note or for a Thanksgiving card to let someone know how grateful you are for them.
The pumpkins were inked with Hello Honey then the edge sponged with Tangelo Twist before stamping. The "thanks" stamp was sponged in the center with Tangelo Twist then the edges with Blackberry Bliss; where the colors overlapped gave a lovely bronze-like color and when the pumpkins were added, you really don't even see the pure Tangelo Twist. Hmm. This layer was added to layers of Tangelo Twist and Hello Honey.
The "Thankful for" was diecut with the Bitty Banners and backed with a Blackberry Bliss diecut banner which was cut in half and added to the back. Some Blendability-colored Rhinestones add the final touch.
Stamps: Fall Fest (pumpkins), Seasonally Scattered (background), Truly Grateful (sentiment)
Inks: Hello Honey, Tangelo Twist, Blackberry Twist.
Papers: Moonlight DSP Stack; Hello Honey, Tangelo Twist, Blackberry Twist, Whisper White cardstocks
Accessories: Rhinestones, Fun Fall Framelits, Bitty Banner Framelits, Stampin' Sponges, Blackberry Bliss Ribbon
Here again is the Color Challenge from Create with Connie and Mary this week:
Be sure to check out the cards the other Challenge Design Team members made with these gorgeous colors! Just go to Create with Connie and Mary and while you're there also see the guidelines for joining us in this challenge! It's fun and also helpful to give one a starting place for a project!!
Thanks for visiting... and keep on stamping! : )
Margaret
Thursday, November 13, 2014
Stars, Snowflakes and Santa!
Welcome! We have a wonderful sketch from Create with Connie and Mary today! It includes a diagonal panel which is currently so trendy in papercrafting!
The background paper is from the All Is Calm DSP collection.. I love this paper and it is so pretty for snow scenes! The vertical stripes are the luxurious Lost Lagoon Silky Taffeta Ribbon in the Holiday Catalog! Yum!
I used the Star Framelits to cut out the focal shapes from cardstock and Dazzling Diamonds Glimmer Paper. The small center star and the snowflake are both heat embossed with embossing powder.
I love this Santa and sleigh silhouette stamp from the Holiday Home set and thought it was perfect flying across this snowy Christmas card!
Stamps: Bright and Beautiful (star), Many Merry Stars (snowflake), Holiday Home (Santa sleigh)
Inks: White Craft, Lost Lagoon
Paper: All is Calm DSP; Lost Lagoon, Pool Party cardstocks, Dazzling Diamonds Glimmer Paper
Accessories: White and Iridescent Ice Embossing Powder (mixed), Heat Tool, Embossing Buddy, Lost Lagoon Silky Taffeta Ribbon, Star Framelits, 7/8" Scallop Punch, 1" Circle Punch, Dimensionals.
Here's the super sketch from Create with Connie and Mary this week:
Isn't this a fun sketch? We would LOVE for YOU to make a card with this sketch too! Share your creativity with us by uploading your sketch challenge card to Create with Connie and Mary website; the guidelines for the challenge are on their blog!
Thanks for visiting! We have pulled out the heavy coats here because of a huge polar front that dropped our temps more than 40 degrees overnight from a perfect 75 to the 30's the next morning, and it's getting colder! Brrr! Hope you are well in your part of the world!
Margaret
The background paper is from the All Is Calm DSP collection.. I love this paper and it is so pretty for snow scenes! The vertical stripes are the luxurious Lost Lagoon Silky Taffeta Ribbon in the Holiday Catalog! Yum!
I used the Star Framelits to cut out the focal shapes from cardstock and Dazzling Diamonds Glimmer Paper. The small center star and the snowflake are both heat embossed with embossing powder.
I love this Santa and sleigh silhouette stamp from the Holiday Home set and thought it was perfect flying across this snowy Christmas card!
Stamps: Bright and Beautiful (star), Many Merry Stars (snowflake), Holiday Home (Santa sleigh)
Inks: White Craft, Lost Lagoon
Paper: All is Calm DSP; Lost Lagoon, Pool Party cardstocks, Dazzling Diamonds Glimmer Paper
Accessories: White and Iridescent Ice Embossing Powder (mixed), Heat Tool, Embossing Buddy, Lost Lagoon Silky Taffeta Ribbon, Star Framelits, 7/8" Scallop Punch, 1" Circle Punch, Dimensionals.
Here's the super sketch from Create with Connie and Mary this week: Isn't this a fun sketch? We would LOVE for YOU to make a card with this sketch too! Share your creativity with us by uploading your sketch challenge card to Create with Connie and Mary website; the guidelines for the challenge are on their blog!
Thanks for visiting! We have pulled out the heavy coats here because of a huge polar front that dropped our temps more than 40 degrees overnight from a perfect 75 to the 30's the next morning, and it's getting colder! Brrr! Hope you are well in your part of the world!
Margaret
Thursday, October 30, 2014
Cheerful Christmas CCMC327
Hooray, It's Thursday and time for another fun challenge from Create with Connie and Mary! This week we have a great sketch which uses a "tilted" panel which is so trendy these days in papercrafting! Here's what I did:
I'm really enjoying this Cheerful Christmas set from the Holiday Catalog! As you can see, the style is truly influenced by Nordic designs; done in Cherry Cobbler it really warms up the design and to me looks like needlework! I stamped the smaller image on Whisper White and diecut it with an Oval Framelit. I cut the plaid paper for the background and adhered it to a Sahara Sand card cut at 4.5" x 11", folded at the top then adhered the oval with Dimensionals.
Next I cut a strip of Sahara Sand 1/2" x 4-1/4 and adhered it with Dimensionals and Snail adhesive. On a small piece of Cherry Cobbler cardstock, I stamped the saying in VersaMark, heat embossed it with White Embossing Powder then adhered it with Dimensionals! Viola, finished!
I made another card using a second background paper, also from the Trim the Tree Paper Stack. I couldn't decide which one I liked better so stuck with my original one for the CWCM Thursday Challenge. Tell me which one you like best... I just couldn't choose!! (you can press the comment button below to leave your answer.) Thanks!
Stamps: Cheerful Christmas, Festival of Trees
Ink: Cherry Cobbler, VersaMark
Paper: Trim the Tree Paper Stack; Sahara Sand, Whisper White and Cherry Cobbler cardstock
Accessories: Ovals Framelits, Bitty Banners Framelits, Regals Candy Dots (Cherry Cobbler), White Embossing Powder, Heat Tool, Dimensionals, Glue Dots.
Here is the Sketch Challenge at Create with Connie and Mary this week:'
Isn't this a great sketch? It's simple, easy and versatile! We would love for you to join us this week at Create with Connie and Mary!! Just go to the website and check out the guidelines, make your card and upload it online then link it on the challenge post at CWCM! That's it! We love to see what you make!
While at the CWCM website be sure to check out what the other Challenge Team members made with this sketch also!! I am always inspired by their creativity!
Thanks for visiting today! Have a good weekend ...Happy Stamping!!
Margaret
I'm really enjoying this Cheerful Christmas set from the Holiday Catalog! As you can see, the style is truly influenced by Nordic designs; done in Cherry Cobbler it really warms up the design and to me looks like needlework! I stamped the smaller image on Whisper White and diecut it with an Oval Framelit. I cut the plaid paper for the background and adhered it to a Sahara Sand card cut at 4.5" x 11", folded at the top then adhered the oval with Dimensionals.
Next I cut a strip of Sahara Sand 1/2" x 4-1/4 and adhered it with Dimensionals and Snail adhesive. On a small piece of Cherry Cobbler cardstock, I stamped the saying in VersaMark, heat embossed it with White Embossing Powder then adhered it with Dimensionals! Viola, finished!
I made another card using a second background paper, also from the Trim the Tree Paper Stack. I couldn't decide which one I liked better so stuck with my original one for the CWCM Thursday Challenge. Tell me which one you like best... I just couldn't choose!! (you can press the comment button below to leave your answer.) Thanks!
Stamps: Cheerful Christmas, Festival of Trees
Ink: Cherry Cobbler, VersaMark
Paper: Trim the Tree Paper Stack; Sahara Sand, Whisper White and Cherry Cobbler cardstock
Accessories: Ovals Framelits, Bitty Banners Framelits, Regals Candy Dots (Cherry Cobbler), White Embossing Powder, Heat Tool, Dimensionals, Glue Dots.
Here is the Sketch Challenge at Create with Connie and Mary this week:'
Isn't this a great sketch? It's simple, easy and versatile! We would love for you to join us this week at Create with Connie and Mary!! Just go to the website and check out the guidelines, make your card and upload it online then link it on the challenge post at CWCM! That's it! We love to see what you make!
While at the CWCM website be sure to check out what the other Challenge Team members made with this sketch also!! I am always inspired by their creativity!
Thanks for visiting today! Have a good weekend ...Happy Stamping!!
Margaret
Thursday, October 16, 2014
Happy Birthday Sketch CCMC325
Thursday is the day for our Create with Connie and Mary Challenge and we have a great sketch to use for our project! This one is simple and oh, so versatile! I decided to use a star in my background in place of the circle and the Star Embossing Folder was perfect for adding "starry" texture to the background!
I took my color scheme from the Sweet Taffy Designer Paper; I love these bright colors for happy occasions like birthdays! This card will be for a sweet child's birthday and I think he will enjoy the colors and the sparkle of the Gold Glimmer Paper stars!
I diecut the Daffodil with a Star Framelit then added the Paper Piercing. Stampin' Up!'s piercing templates make it SO easy and I really like the additional texture the piercing adds.
Stamps: Endless Birthday Wishes
Inks: VersaMark
Paper: Tempting Turquoise, Daffodil Delight, Pumpkin Pie. Sweet Taffy DSP. Gold Glimmer Paper
Accessories: White Embossing Powder, Eclectic Paper Piercing Pack, Paper Piercing tool, Stars TIEF, Star Framelits, small Star Punch from Itty Bitty Accents Punch Pack.
Here again is the super sketch we have this week for CCMC325:
I can't wait to see what YOU do with this sketch! It can be Clean and Simple or you can do something different and add more layers and embellishments, whatever appeals to you!
Hop on over to the Create with Connie and Mary blog to see what the other very creative members of the Challenge Design Team did with this sketch; I'm always inspired by their work! Then whip up your own design and upload it to the CCMC website; the guidelines for the challenge are all there too!
Thanks for visiting today! Happy Stamping!
Margaret
I took my color scheme from the Sweet Taffy Designer Paper; I love these bright colors for happy occasions like birthdays! This card will be for a sweet child's birthday and I think he will enjoy the colors and the sparkle of the Gold Glimmer Paper stars!
I diecut the Daffodil with a Star Framelit then added the Paper Piercing. Stampin' Up!'s piercing templates make it SO easy and I really like the additional texture the piercing adds.
Stamps: Endless Birthday Wishes
Inks: VersaMark
Paper: Tempting Turquoise, Daffodil Delight, Pumpkin Pie. Sweet Taffy DSP. Gold Glimmer Paper
Accessories: White Embossing Powder, Eclectic Paper Piercing Pack, Paper Piercing tool, Stars TIEF, Star Framelits, small Star Punch from Itty Bitty Accents Punch Pack.
Here again is the super sketch we have this week for CCMC325: I can't wait to see what YOU do with this sketch! It can be Clean and Simple or you can do something different and add more layers and embellishments, whatever appeals to you!
Hop on over to the Create with Connie and Mary blog to see what the other very creative members of the Challenge Design Team did with this sketch; I'm always inspired by their work! Then whip up your own design and upload it to the CCMC website; the guidelines for the challenge are all there too!
Thanks for visiting today! Happy Stamping!
Margaret
Saturday, October 11, 2014
ARE YOU READY FOR SOME FOOTBALL?
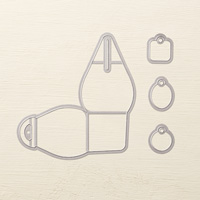
Well, it's Saturday so lots of college football games in the U.S. today! I used my Curvy Keepsake Box Framelit to make these little treat boxes and decorated them for each of our large universities in Oklahoma; both are playing today!
The Oklahoma State University Cowboys are orange, black and white. The cowboy hat was colored in dark gray (Basic Gray) even though it has a real blue-ish cast in the picture. Go Pokes!
The University of Oklahoma is the Sooners. I used Cherry Cobbler which is perfect for their crimson color. The letters were diecut with the Little Letters Framelits. Boomer Sooner!
I made both of these so that they can be opened to retrieve the treats inside. The flap can be carefully lifted over the OU letters to open it; the Cowboy hat was cut out leaving a v-shaped flap on the bottom so it can be inserted down between the top flaps of the box and easily removed.
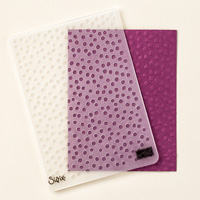
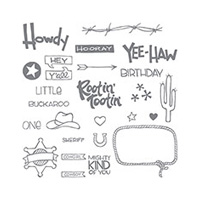
Other: Little Letters Framelits, 2.5" Circle Punch, Decorative Dots TIEF, Paper Snips, Personal Paper Trimmer, Big Shot Die-Cutting Machine. Cowboy hat from the YeeHaw set.
I just love this Curvy Keepsake Box Framelit! I've seen so many creative ways stampers have decorated this box... it seems the variations are endless! And the box itself is so easy to make it's ridiculous!
Hope you enjoy your weekend, football or not! Happy Stamping!
Happy stamping!
Margaret
The Oklahoma State University Cowboys are orange, black and white. The cowboy hat was colored in dark gray (Basic Gray) even though it has a real blue-ish cast in the picture. Go Pokes!
The University of Oklahoma is the Sooners. I used Cherry Cobbler which is perfect for their crimson color. The letters were diecut with the Little Letters Framelits. Boomer Sooner!
I made both of these so that they can be opened to retrieve the treats inside. The flap can be carefully lifted over the OU letters to open it; the Cowboy hat was cut out leaving a v-shaped flap on the bottom so it can be inserted down between the top flaps of the box and easily removed.
Other: Little Letters Framelits, 2.5" Circle Punch, Decorative Dots TIEF, Paper Snips, Personal Paper Trimmer, Big Shot Die-Cutting Machine. Cowboy hat from the YeeHaw set.
I just love this Curvy Keepsake Box Framelit! I've seen so many creative ways stampers have decorated this box... it seems the variations are endless! And the box itself is so easy to make it's ridiculous!
Hope you enjoy your weekend, football or not! Happy Stamping!
Happy stamping!
Margaret
Friday, October 3, 2014
Curvy Keepsake Box Cuties!
Have you tried the new Curvy Keepsake Box Thinlit Die? I bought it but didn't use it right away; when I did, I was surprised at how easy and FUN it is to use! Addictive even? lol! Here are a couple of the first ones I made:
A pumpkin of course... after all, it's fall! Pumpkin Pie cardstock stamped with Tangerine Tango ink using a stamp from the Work of Art set. Pear Pizzazz ribbon, Old Olive leaf, curlycue and baker's twine. Autumn Elements leaf too! So simple!
This little penguin makes me think of Happy Feet : ) Box in black decorated with punches: Modern Label, Large Oval and Owl Builder Punch.
The tag of Dazzling Diamonds Glimmer Paper was cut with a framelit that comes with the Curvy Keepsake Box Framelit and is adorned with an All is Calm Snowflake. So fun and easy! I can't wait to make more for Christmas treats, ornaments or gift holders!
Have a good weekend! Happy Stamping!
Margaret
A pumpkin of course... after all, it's fall! Pumpkin Pie cardstock stamped with Tangerine Tango ink using a stamp from the Work of Art set. Pear Pizzazz ribbon, Old Olive leaf, curlycue and baker's twine. Autumn Elements leaf too! So simple!
This little penguin makes me think of Happy Feet : ) Box in black decorated with punches: Modern Label, Large Oval and Owl Builder Punch.
The tag of Dazzling Diamonds Glimmer Paper was cut with a framelit that comes with the Curvy Keepsake Box Framelit and is adorned with an All is Calm Snowflake. So fun and easy! I can't wait to make more for Christmas treats, ornaments or gift holders!
Have a good weekend! Happy Stamping!
Margaret
Subscribe to:
Posts (Atom)