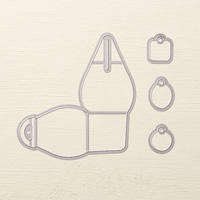
Well, it's Saturday so lots of college football games in the U.S. today! I used my Curvy Keepsake Box Framelit to make these little treat boxes and decorated them for each of our large universities in Oklahoma; both are playing today!
The Oklahoma State University Cowboys are orange, black and white. The cowboy hat was colored in dark gray (Basic Gray) even though it has a real blue-ish cast in the picture. Go Pokes!
The University of Oklahoma is the Sooners. I used Cherry Cobbler which is perfect for their crimson color. The letters were diecut with the Little Letters Framelits. Boomer Sooner!
I made both of these so that they can be opened to retrieve the treats inside. The flap can be carefully lifted over the OU letters to open it; the Cowboy hat was cut out leaving a v-shaped flap on the bottom so it can be inserted down between the top flaps of the box and easily removed.
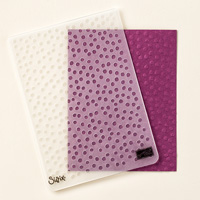
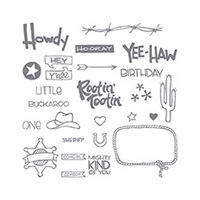
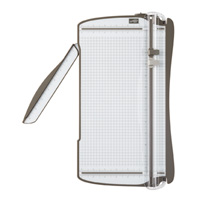
Other: Little Letters Framelits, 2.5" Circle Punch, Decorative Dots TIEF, Paper Snips, Personal Paper Trimmer, Big Shot Die-Cutting Machine. Cowboy hat from the YeeHaw set.
I just love this Curvy Keepsake Box Framelit! I've seen so many creative ways stampers have decorated this box... it seems the variations are endless! And the box itself is so easy to make it's ridiculous!
Hope you enjoy your weekend, football or not! Happy Stamping!
Happy stamping!
Margaret
Showing posts with label Bags Boxes Baskets. Show all posts
Saturday, October 11, 2014
Thursday, February 16, 2012
Fancy Favor Blossom Basket
Ahhh, it's sunny here today and even though it's still a little cool, it makes me think that Spring is coming! Yay! Now there is a theme challenge for subscribers over on the Occasions 2012 edition of Create with Connie and Mary for "A Little Treat for Someone Sweet"; of course I thought of using flowers and the beautiful floral prints in the Twitterpated Designer Series Paper for my project. Did you follow all that? lol! You're good!!
I diecut the versatile Fancy Favor Bigz XL Die (#115965) in Baja Breeze for my treat box and the Lattice Bigz Die (#115965) in white to cover both the front and back of the box.
The flower is punched with the new Blossom Punch (#125603) from the Occasions 2012 Mini Catalog; I used the Twitterpated Designer Series Paper, Riding Hood Red and Blushing Bride then layered them, adding a small Island Indigo flower and an Everyday Enchantment brad (from the Sale-A-Bration bonus pack free with a $50. order). The leaves are Lucky Limeade cardstock punched with the same Blossom Punch then cut apart and tucked underneath the flower.
I added a 3/4" wide cardstock handle covered with the Blushing Bride ribbon and finished it off with tiny bow/knots of the same on each side. This is such an easy box to make and the Fancy Favor die not only cuts the cardstock, it scores it for you so there's no problem knowing where to fold and join it!!
I'm pleased with the way the treat box turned out; this or a similar box could hold all sorts of treats or treasures to give to someone. With Easter, May Day, Mother's Day, not to mention Graduation, Father's Day and retirements (not to mention birthdays, parties, showers,...) coming up in the next few months, this would be a very useful addition to your gifting arsenal! Whew, I better get busy myself!!
All of the products to make this box are available on my secure online official Stampin' Up! website/store HERE. When you order, be sure to include a free Sale-a-Bration bonus gift for every $50. you spend; your order will be delivered directly to your door!! You may view the Sale-A-Bration brochure HERE. Please contact me with any questions: fun stampin @ cox. net (remove the spaces)
Thanks for visiting today! Wishing you blue skies and sunshine too!
Margaret
I diecut the versatile Fancy Favor Bigz XL Die (#115965) in Baja Breeze for my treat box and the Lattice Bigz Die (#115965) in white to cover both the front and back of the box.
I added a 3/4" wide cardstock handle covered with the Blushing Bride ribbon and finished it off with tiny bow/knots of the same on each side. This is such an easy box to make and the Fancy Favor die not only cuts the cardstock, it scores it for you so there's no problem knowing where to fold and join it!!
I'm pleased with the way the treat box turned out; this or a similar box could hold all sorts of treats or treasures to give to someone. With Easter, May Day, Mother's Day, not to mention Graduation, Father's Day and retirements (not to mention birthdays, parties, showers,...) coming up in the next few months, this would be a very useful addition to your gifting arsenal! Whew, I better get busy myself!!
All of the products to make this box are available on my secure online official Stampin' Up! website/store HERE. When you order, be sure to include a free Sale-a-Bration bonus gift for every $50. you spend; your order will be delivered directly to your door!! You may view the Sale-A-Bration brochure HERE. Please contact me with any questions: fun stampin @ cox. net (remove the spaces)
Thanks for visiting today! Wishing you blue skies and sunshine too!
Margaret
Saturday, March 5, 2011
Big Shot Bunny Basket
Whoa! It's March already and Easter will be coming up before I know it! I just love things made with my Big Shot so when I saw a bunny basket on a blog, I just knew I had to make a version of my own!
The basket portion is actually a white box cut with the Fancy Favor Bigz XL Die. The bunny front and back are cut with the large Scallop Circle die, ears with the Wide Oval Punch and Large Oval Punch and feet also with a Wide Oval Punch. The cheeks are 1" Circle Punches, eyes 3/4" and 1/2" Circle Punches and nose is the Heart Small Punch. (All the punches are on pages 200 to 203 in the Idea Book and Catalog). Thin white cardstock slivers cut with the SU Tabletop Trimmer are used for whiskers.
All the white cardstock pieces were sponged on the edges with Pretty in Pink ink except the eyeballs, which I sponged in Bashful Blue. The handle was punched out of Pretty in Pink cardstock with the Dotted Scallop Ribbon Border and adhered with Snail adhesive and 5/16" White Jumbo Brads. On the back I added a white tissue "puff" made with a flower punch and mini brad for a little cottontail. (oops, no picture!)
The white highlights on the eyes were done with the Signo White Gel Pen, the mouth with the Early Espresso Stampiin' Write Marker and her paws marked with the Crumb Cake Stampin' Write Marker. The little pink bow was laying on my stamping desk, being made but unused from a previous project, so I just stuck it on her ear at the last minute for fun. : )
This box is quite roomy at 2-1/4" deep, 3" wide and 3-1/2" tall so it will hold a nice gift or treats! I already know a little girl who will love this one! Now to fill it will something other than just paper shreds...
All products Stampin' Up! and can be ordered through my SU website store or by contacting me personally.
Thanks to Chris Galbraith who inspired me with a bunny basket on her blog.
Thanks for visiting today! Hope you enjoy your weekend! We had nice sunshine today which was so warming even though the wind was still a bit chilly!
Margaret
Thursday, January 20, 2011
Elegant Lines Matchbox Gift
One of the great items in the Stampin' Up! Catalog is the Matchbox Bigz XL Die (#114890). You can do so many things with it, more than I realized when I first saw it. Here's a pretty little matchbox in Cherry Cobbler cardstock that will hold four chocolate nuggets, which can be wrapped in coordinating paper if one wishes.
Above is the box closed and standing upon it's side. The outside layer was embossed with the Elegant Lines Embossing Folder after it was die cut with the Big Shot.
The above view shows the cover removed; the box portion will hold four nuggets, other candy or some really nice jewelry (a girl can dream, can't she, lol!).
A similar view but higher above. The "Thanks" was stamped in Cherry Cobbler ink and punched out with the Scallop Oval Punch; beautiful Victorian crochet lace trim is wrapped around the outer cover and a clear Rhinestone Brad was added to hold the lace together.
You can visit my Stampin' Up! store here and see the new Occasions Mini products as well as place your order.
Thanks for visiting today! I hope you have a great day!
Margaret
Monday, June 7, 2010
Pansy Fancy Favor Box
I'm having fun creating things to use these beautiful pansies on that are made with the Butterfly Punch, Shimmery White cardstock and Ink Refills! Today's project is a Fancy Favor Diecut Basket using the retiring but lovely Tea Party Designer Series Paper. These are so easy to make with the Big Shot and Die, it's incredible. You could fairly quickly make enough favors for a party, luncheon, gifts or whatever your need, and wow your recipients too!I cut an additional one inch strip of the same paper and turned it on the reverse side when I cut my paper and die through the Big Shot. I attached it to the top edge for accent color. The leaf stems were easily diecut with the Little Leaves Sizzlet and Old Olive cardstock. (This is probably my most-used Sizzlet. You NEED this! lol!) The pansies were added with Dimensionals.

The "for you" greeting is from the Great Friend stamp set. It was stamped in Elegant Eggplant onto Very Vanilla cardstock, cut into a banner and sponged with Almost Amethyst ink. I shaped it with my fingers and attached it with Mini Glue Dots.
The "handle" to the basket is the So Saffron 1/2" Striped Grosgrain Ribbon (also retiring!) attached on both sides with a Gold Mini Brad. The inside where the bottom of the brad showed was covered up with a small So Saffron flower punched with the BoHo Blossoms Punch (love those small flowers!! So handy!!)
Right now is your LAST CHANCE to purchase some wonderful accessories, stamp sets and home decor wall elements! Check out the details on my Stampin' Up! website HERE. When current supplies are gone, they will never be available again so don't delay in ordering!
Thanks for visiting today! Have a stampin' good day!
Margaret
Monday, May 17, 2010
Tropical Party & Island Oasis Duo
I'm having so much fun with this Tropical Party set from the new Summer Mini Catalog! Today's projects pair it with the fun new coordinating Island Oasis Designer Series Paper. Tones of Tempting Turquoise, Rose Red, So Saffron, Pumpkin Pie and Old Olive are used in the paper and are reflected on my projects today.
The 3-D Scallop Bag is the perfect size for party favors, tiny treasures, small gifts or yummy
treats (like chocolate!) It is die cut with the Bigz XL Scallop Bag die and the Big Shot and it only takes half a sheet of 12 x 12" cardstock, or in this case, designer paper. It is super easy to assemble; I used my Stampin' Up! 2-Way Glue Pen on this one and it worked great, and not messy either! I love how the bold floral paper looks made up into this! The top fold-over flap is scalloped but is hidden behind the flowers here.
A Rose
Red flower cut out with the Fancy Flower Punch is topped with a Tempting Turquoise flower die cut with the Stampin' Up! Island Floral Die (also new in the mini), then a small So Saffron flower punched with the BoHo Blossoms punch. A White Jumbo Brad covered with Dazzling Diamonds Glitter secures the flower. Old Olive cardstock leaves were punched with the 5-Petal Flower Punch then treated to some dry embossing with the Stylus. A Metal Clip from the Clips Assortment sports an olive ribbon knot and holds the flap shut.
The card uses the Tropical Party set and the Scalloped Oval Frame Die. I used the card sketch from Stamping411 Saturday Sketch Challenge #151. The turquoise frame was die cut then run through the Big Shot again with the Distressed Texturz Plate to give it more emphasis and go with the beach theme. A band of one of the Island Oasis DSP prints goes across the Old Olive card underneath the frame then a few palm fronds stamped on in Old Olive ink. Three of the larger tropical flower were stamped in coordinating colors, cut out then applied to the frame.
The greeting for the card is from Teeny Tiny Wishes (great set!) and is stamped on So Saffron then punched with the Modern Label Punch and layered on additional punchouts of Pumpkin Pie and Rose Red to give it a frame and pull the color scheme together.
I hope you enjoyed today's projects! It's always fun to hear from you who visit here, so leave me a shout-out if you would! Thanks!
Margaret
The 3-D Scallop Bag is the perfect size for party favors, tiny treasures, small gifts or yummy
treats (like chocolate!) It is die cut with the Bigz XL Scallop Bag die and the Big Shot and it only takes half a sheet of 12 x 12" cardstock, or in this case, designer paper. It is super easy to assemble; I used my Stampin' Up! 2-Way Glue Pen on this one and it worked great, and not messy either! I love how the bold floral paper looks made up into this! The top fold-over flap is scalloped but is hidden behind the flowers here. A Rose
Red flower cut out with the Fancy Flower Punch is topped with a Tempting Turquoise flower die cut with the Stampin' Up! Island Floral Die (also new in the mini), then a small So Saffron flower punched with the BoHo Blossoms punch. A White Jumbo Brad covered with Dazzling Diamonds Glitter secures the flower. Old Olive cardstock leaves were punched with the 5-Petal Flower Punch then treated to some dry embossing with the Stylus. A Metal Clip from the Clips Assortment sports an olive ribbon knot and holds the flap shut.The card uses the Tropical Party set and the Scalloped Oval Frame Die. I used the card sketch from Stamping411 Saturday Sketch Challenge #151. The turquoise frame was die cut then run through the Big Shot again with the Distressed Texturz Plate to give it more emphasis and go with the beach theme. A band of one of the Island Oasis DSP prints goes across the Old Olive card underneath the frame then a few palm fronds stamped on in Old Olive ink. Three of the larger tropical flower were stamped in coordinating colors, cut out then applied to the frame.
The greeting for the card is from Teeny Tiny Wishes (great set!) and is stamped on So Saffron then punched with the Modern Label Punch and layered on additional punchouts of Pumpkin Pie and Rose Red to give it a frame and pull the color scheme together.I hope you enjoyed today's projects! It's always fun to hear from you who visit here, so leave me a shout-out if you would! Thanks!
Margaret
Sunday, March 28, 2010
Vintage Vogue Explosion Box Card
An Explosion Box is so cool to make and it's so much fun to see the look on the recipient's face when they open it! It has been several years since I made one so I was excited that Jann McCollom brought this Make 'n Take to our Stamp Therapy meeting about a week ago. We all loved it! The box/card base is So Saffron, the Designer Paper used is Razzleberry Lemonade and the ribbon is Stitched Rose Red 1 1/4" grosgrain. The flower on the top is made from Pretty in Pink cardstock punched with the Fancy Flower Punch and the leaves are loops of Old Olive Satin Ribbon. The little banner coming out from underneath the flower has a sentiment on it from the Vintage Vogue set (Occasions Mini Catalog) that says "You raise kindness to an art."
Here are a few more views of the box:
The lid of the box showing the flower center, a So Saffron mini brad:
And finally, the lid removed and the box open:
The inside is stamped with the Vintage Vogue set. A square of Whisper White is stamped with the Friend stamp from the same set.
What a fun and special card/box to give to a friend! You can actually put a small gift in the box. The box size is a 2 3/4" cube.
Stamps: Vintage Vogue
Ink: So Saffron and Rose Red Classic, Rose Red Craft
Paper: Razzleberry Lemonade Designer Paper; So Saffron, Pretty in Pink, Whisper White cardstock
Accessories: Fancy Flower Punch, Clear Embossing Powder, So Saffron Brad, Heat Tool, Old Olive Satin Ribbon, Dimensional. All products from Stampin' Up!
I have no written instructions for this but the beginning size of the base cardstock is 8 1/4" x 8 1/4" and the size of the cardstock for the lid is 5" x 5". I did Google and found instructions for Explosions Boxes on numerous websites and blogs.
Thanks for visiting today! Have a great week!
at
5:17 PM
Labels:
3-D,
Bags Boxes Baskets,
Occasions Mini Catalog,
Paper Flowers,
Punches
5 comments:
Monday, February 15, 2010
Petal Card Die Box II
Here is another box made with the Petal Card Die for the Big Shot diecutting machine. These boxes are so fun and easy to make... you really need this die! I'm really having fun exploring the ways to use it!
The box was constructed from four petal card diecuts of Orchid Opulence cardstock. {see instructions here} Each of the four sides was covered with either Certainly Celery or So Saffron cardstock then a layer of the delicate polka dot pattern from the Shades of Spring Designer Series Paper.

I made paper flowers from coordinating colors of So Saffron, Pretty in Pink and another piece of the dotted DSP used for the background. The new Extra Large Fancy Flower punch was used for the So Saffron flower. Before punching, I stamped the cardstock with the new Fine Flourish stamp from the Occasions Mini in So Saffron ink. I snipped the petals further in toward the center and curled each petal with my bone folder. The BoHo Blossoms Punch was used to punch the second flower out of the same polka dot DSP; I
did the same clipping of petals and bending the paper petals with my fingers. The pink center was punched with the same BoHo Blossoms punch, curled and then all three flowers put together with a So Saffron Brad from the Rich Regals Brads assortment. The flower was then attached to both the front and back of the box with Mini Glue Dots (gotta love those things!)
Certainly Celery cardstock, prestamped with the Fine
Flourish stamp in celery, were punched out with the Five Petal Flower Punch, cut into individual petals, creased down the center and used for the leaves. They were adhered with Mini Glue Dots.
Luxurious Pretty in Pink Satin Ribbon was used for the bow and tie around the box for the finishing touch. (pic. 4, side view)
You can see all my other Petal Card Die creations by clicking on "Petal Card die" in the Labels at the bottom of this post.
Thanks for dropping by. I hope you like this spring box with the Petal Card Die! Thanks for leaving me a comment too!
Margaret
The box was constructed from four petal card diecuts of Orchid Opulence cardstock. {see instructions here} Each of the four sides was covered with either Certainly Celery or So Saffron cardstock then a layer of the delicate polka dot pattern from the Shades of Spring Designer Series Paper.

I made paper flowers from coordinating colors of So Saffron, Pretty in Pink and another piece of the dotted DSP used for the background. The new Extra Large Fancy Flower punch was used for the So Saffron flower. Before punching, I stamped the cardstock with the new Fine Flourish stamp from the Occasions Mini in So Saffron ink. I snipped the petals further in toward the center and curled each petal with my bone folder. The BoHo Blossoms Punch was used to punch the second flower out of the same polka dot DSP; I
did the same clipping of petals and bending the paper petals with my fingers. The pink center was punched with the same BoHo Blossoms punch, curled and then all three flowers put together with a So Saffron Brad from the Rich Regals Brads assortment. The flower was then attached to both the front and back of the box with Mini Glue Dots (gotta love those things!)Certainly Celery cardstock, prestamped with the Fine
Flourish stamp in celery, were punched out with the Five Petal Flower Punch, cut into individual petals, creased down the center and used for the leaves. They were adhered with Mini Glue Dots.Luxurious Pretty in Pink Satin Ribbon was used for the bow and tie around the box for the finishing touch. (pic. 4, side view)
You can see all my other Petal Card Die creations by clicking on "Petal Card die" in the Labels at the bottom of this post.
Thanks for dropping by. I hope you like this spring box with the Petal Card Die! Thanks for leaving me a comment too!
Tuesday, February 9, 2010
"Sending Love" with a Petal Card Die Box
Today is another chapter in using the Petal Card Die! You can actually make a 2.5" "cube" box with it! Cool, hmm??
Cut four Petal Card diecuts
with the Big Shot and the Petal Card Die in cardstock of your choice. Trim one "petal" scallop off each diecut at the score line (A). Lay the diecuts face down on your work surface then overlap the scallop on the side opposite of where the scallop was removed onto the straight edge of the die cut (see picture B). Adhere them with Mono Adhesive, Glue Stick or Sticky Strip. This will give you a line of four petal cards glued together. (C)
Turn this over and decorate the sides of your box while it is flat; it's much easier now than later! : ) Then crease all the score llines and assemble your box by adhering the last scallop and straight edge. You're almost finished!
Crease the score lines to make the bottom of your box then fold these scallops in like you close a four flap box (half of each flap will be showing, see pic on left below). You may add a little adhesive to the flaps now if you wish but it will hold some weight even without glue. Now set the box right side up and crease the top flaps and fold in the same manner. Add a beautiful ribbon such as the Pink Satin Ribbon from the Occasions Mini Catalog, and Viola! You're finished!

Now tuck some delicious treat or small but special gift inside, tie on a bow and you're ready for the occasion! Anyone would be delighted to receive such an enchanting little box with a treasure inside!
Great for shower, party or wedding favors also!
My red box features Real Red and Pretty in Pink Cardstock, Sending Love Designer Series Paper (already glittered!) and luscious Pink Satin Ribbon. All products by Stampin' Up!
Thanks for coming by today! Wishing you a good day! Leave me a shout out by clicking on "comments" in the tiny letters at the end of today's post and let me know if this post was helpful!? THANK YOU!
Margaret
p.s. Save the scallops you cut off when you make your box; we will be using them for another project with this die! ... to be continued... : )
Cut four Petal Card diecuts
with the Big Shot and the Petal Card Die in cardstock of your choice. Trim one "petal" scallop off each diecut at the score line (A). Lay the diecuts face down on your work surface then overlap the scallop on the side opposite of where the scallop was removed onto the straight edge of the die cut (see picture B). Adhere them with Mono Adhesive, Glue Stick or Sticky Strip. This will give you a line of four petal cards glued together. (C)
Turn this over and decorate the sides of your box while it is flat; it's much easier now than later! : ) Then crease all the score llines and assemble your box by adhering the last scallop and straight edge. You're almost finished!Crease the score lines to make the bottom of your box then fold these scallops in like you close a four flap box (half of each flap will be showing, see pic on left below). You may add a little adhesive to the flaps now if you wish but it will hold some weight even without glue. Now set the box right side up and crease the top flaps and fold in the same manner. Add a beautiful ribbon such as the Pink Satin Ribbon from the Occasions Mini Catalog, and Viola! You're finished!

Now tuck some delicious treat or small but special gift inside, tie on a bow and you're ready for the occasion! Anyone would be delighted to receive such an enchanting little box with a treasure inside!Great for shower, party or wedding favors also!
My red box features Real Red and Pretty in Pink Cardstock, Sending Love Designer Series Paper (already glittered!) and luscious Pink Satin Ribbon. All products by Stampin' Up!
Thanks for coming by today! Wishing you a good day! Leave me a shout out by clicking on "comments" in the tiny letters at the end of today's post and let me know if this post was helpful!? THANK YOU!
p.s. Save the scallops you cut off when you make your box; we will be using them for another project with this die! ... to be continued... : )
Saturday, February 6, 2010
Petal Card Die Hanging Heart Box
Here's another of my projects I've been making using the Petal Card Die: a Hanging Heart Box. I love how it really takes on so much dimension by being treating to a pass through the Big Shot in an Embossing Folder, this time the Stampin' Up! Finial Press folder. This box can be used for so many things, or simply as a home decoration when decorated with a theme.
Cut out two of the diecuts, then decorate the front diecut as desired. Fold back two of the scallops, forming a heart. Do this on both diecuts. Cut a piece of cardstock 5" long and the desired width for your box; I cut mine 5" x 1.5". Crease it in the center at 2.5", then put Sticky Strip heavy-duty double sided adhesive down both edges of this strip. The crease will go at the point of the heart and the scallop is adhered to the cardstock strip, forming the "box".Apply a Jumbo Grommet with the Crop-A-Dile and tie a hanger of the luxurious Satin Ribbon through the grommets, knotting the ends. (Love that gorgeous ribbon!!) You're done and it is really quite easy!
These can be decorated for any occasion or season and would be a lovely container for a gift or candy!
Thanks for visiting today! I would love for you to acknowledge your visit and say "Hi!" by leaving a comment! Thanks!
Have a great weekend!
Margaret
Friday, February 5, 2010
Petal Card Die Box
I've been exploring some of the uses for the Petal Card Die for my Big Shot machine. Who knew that this die could be used for so much more that the expected basic Petal Card? I've made a hanging heart candy holder, a square candy holder, corner bookmarks and a hanging heart box so far; today I have a darling little box that is useful for so many occasions!
I cut a 5.5" square of Basic Black cardstock and scored it with the scoring blade on my 12" Paper Trimmer 1.5" from each edge to make the base of the box. For the lid, I stamped a piece of Whisper White cardstock with the desired image; I used the I {Heart} Hearts set and stamped the filagree heart in Basic Black and the dotted line heart in Real Red. This was die cut with the Big Shot and the Petal Card Die then folded on the score lines. Scallop Circle Punches of Real Red like little red petticoats peek out from (and form) the corners of the lid for a colorful element!
A tie of luxurious Real Red Satin Ribbon encircles the box; hearts stamped with the same set, punched with the Small Heart Punch (new!) and the Trio Heart Punch are adorned with a single red Rhinestone Brad and set atop the box for the final touch!
The final dimensions of the box are 2.5" square by 1.5" deep. Can't you just see these boxes used for everything from handcrafted gift boxes for those very special small gifts, wedding and shower favors, Valentine's, birthdays or any occasion. Just stamp and decorate accordingly and you'll make a big hit with them!
***Remember that $2. from every I {Heart} Hearts set purchased until February 28 will be donated to the Haiti relief fund by Stampin' Up!***
The color scheme of Red, Black and White is this Friday's Blogger's Challenge also! You may check here to see the list of talented players and see what they have done with this challenge! (Not everyone is able to participate every week).
Stamps: I {Heart} Heart set #118571 (clear mount)
Ink: Real Red, Basic Black
Paper: Whisper White, Real Red, Basic Black
Accessories: Big Shot, Petal Card Die, Scallop Circle Punch, 12" Paper Trimmer w/ cutting and scoring blades, Real Red Satin Ribbon, Small Heart Punch, Trio Heart Punch.
Thanks for dropping by. I plan to post the Hanging Heart Box made with the Petal Card die tomorrow!
Margaret
I cut a 5.5" square of Basic Black cardstock and scored it with the scoring blade on my 12" Paper Trimmer 1.5" from each edge to make the base of the box. For the lid, I stamped a piece of Whisper White cardstock with the desired image; I used the I {Heart} Hearts set and stamped the filagree heart in Basic Black and the dotted line heart in Real Red. This was die cut with the Big Shot and the Petal Card Die then folded on the score lines. Scallop Circle Punches of Real Red like little red petticoats peek out from (and form) the corners of the lid for a colorful element!
A tie of luxurious Real Red Satin Ribbon encircles the box; hearts stamped with the same set, punched with the Small Heart Punch (new!) and the Trio Heart Punch are adorned with a single red Rhinestone Brad and set atop the box for the final touch!
The final dimensions of the box are 2.5" square by 1.5" deep. Can't you just see these boxes used for everything from handcrafted gift boxes for those very special small gifts, wedding and shower favors, Valentine's, birthdays or any occasion. Just stamp and decorate accordingly and you'll make a big hit with them!***Remember that $2. from every I {Heart} Hearts set purchased until February 28 will be donated to the Haiti relief fund by Stampin' Up!***
The color scheme of Red, Black and White is this Friday's Blogger's Challenge also! You may check here to see the list of talented players and see what they have done with this challenge! (Not everyone is able to participate every week).
Stamps: I {Heart} Heart set #118571 (clear mount)
Ink: Real Red, Basic Black
Paper: Whisper White, Real Red, Basic Black
Accessories: Big Shot, Petal Card Die, Scallop Circle Punch, 12" Paper Trimmer w/ cutting and scoring blades, Real Red Satin Ribbon, Small Heart Punch, Trio Heart Punch.
Thanks for dropping by. I plan to post the Hanging Heart Box made with the Petal Card die tomorrow!
Margaret
Sunday, September 20, 2009
Trick or Treat Favor Basket Box
I just love these cute little boxes made from the Baskets and Blooms die! Instead of making the basket with the round bottom, a strip of cardstock was used to make a flat basket that is 2" deep and is great for small gifts, candy, favors or whatever you can think up! I made my first one at a pre-Stampin' Up! Convention stamp camp and just loved them!After die-cutting the front and back pieces, the flap was trimmed off each then they were run through the Big Shot with the new Perfect Details Texturz Plates for that cool diamond pattern.
This basket, which holds a bag of candy in a cello bag surrounded by black paper shreds, is embellished with a tie of the lusciously soft and pliable Pumpkin Pie Striped Wide Grosgrain Ribbon. I have three of the colors already and can't wait to get the fourth! This ribbon is so supple and ties so nicely! It also adds a great splash of color to projects! You'll love it!
Stamps: Holiday Best (Level 1 Hostess set)
Ink: Basic Black
Paper: Pumpkin Pie, Basic Black, Very Vanilla card stock
Tools: Big Shot, Baskets and Blooms Die, Perfect Details Texturz Plate, Ribbon, Curly Label Punch, Wide Oval Punch
Accessories: 1 1/4" Pumpkin Pie Striped Grosgrain
Thanks for dropping by! Come back soon!
Margaret
Thursday, August 13, 2009
More Boxes with the Box #2 Die
A few weeks ago I post a few boxes made with the Box #2 Die and the Big Shot Diecutting Machine. Today I have a couple more to share with you. These are so easy even a... well, you know the rest! Totally easy!
Both boxes are diecut from Real Red cardstock then decorated. The "Good Luck!" box has dice embossed on each end and the saying is a rub-on from the Cheery Chat Rub-On Collection. The top flap is made by cutting
both the Jackpot Designer Paper and a piece of white cardstock with the Scallop #2 Die then adhering them together. A black grosgrain ribbon handle and narrow red grosgrain ribbon bows adorn the box. On the very top of the flap, you can see in the smaller picture the word Jackpot is stamped in red and black and layered on red for effect.
A jumbo silver brad layered onto a punched circle of Real Red is the front closure with a small square of Velcro underneath the flap to hold it closed.
The second box purse uses the same basic "ingredients" as the previous one but the front closure is a Build-A-Brad with a poker chip cut out of one of the sheets of Jackpot Designer Paper underneath. Chips from the same paper were punched out and added to the ribbon "handle" for embellishment. "Game Night" words were embossed on the front with VersaMark and White Embossing Powder.
These are so much fun to make and give! I'm amazed by all the different projects I've seen using this die!
Stamps: Game Night
Ink: Real Red, Basic Black, VersaMark
Paper: Jackpot Designer Series Paper; Real Red, Basic Black, Whisper White
Accessories: Build-A-Brad, White Embossing Powder, Jumbo Silver Brad, Black 5/8" Grosgrain Ribbon, 1" Circle Punch.
Hope you have a great day! Thanks for coming by!
Margaret
Both boxes are diecut from Real Red cardstock then decorated. The "Good Luck!" box has dice embossed on each end and the saying is a rub-on from the Cheery Chat Rub-On Collection. The top flap is made by cutting
both the Jackpot Designer Paper and a piece of white cardstock with the Scallop #2 Die then adhering them together. A black grosgrain ribbon handle and narrow red grosgrain ribbon bows adorn the box. On the very top of the flap, you can see in the smaller picture the word Jackpot is stamped in red and black and layered on red for effect.A jumbo silver brad layered onto a punched circle of Real Red is the front closure with a small square of Velcro underneath the flap to hold it closed.
The second box purse uses the same basic "ingredients" as the previous one but the front closure is a Build-A-Brad with a poker chip cut out of one of the sheets of Jackpot Designer Paper underneath. Chips from the same paper were punched out and added to the ribbon "handle" for embellishment. "Game Night" words were embossed on the front with VersaMark and White Embossing Powder.These are so much fun to make and give! I'm amazed by all the different projects I've seen using this die!
Stamps: Game Night
Ink: Real Red, Basic Black, VersaMark
Paper: Jackpot Designer Series Paper; Real Red, Basic Black, Whisper White
Accessories: Build-A-Brad, White Embossing Powder, Jumbo Silver Brad, Black 5/8" Grosgrain Ribbon, 1" Circle Punch.
Hope you have a great day! Thanks for coming by!
Margaret
Sunday, July 26, 2009
Parisian Breeze Box Purse
These little purses made with the Box #2 die are so much fun to make! I made this one for a
Hostess gift this week and filled it with goodies for her. These Specialty Designer Papers are so great to work with because of the cardstock weight and nice texture! I was sad to see this Parisian Breeze package retire a few weeks ago but still enjoy using it!
I chose to use the plaid side of the DSP on the outside and the petite flowers make a nice "lining" and a pretty surprise for the inside. I also used some Kraft cardstock and the dainty floral for the embellishment and trim on the outside.
Hostess gift this week and filled it with goodies for her. These Specialty Designer Papers are so great to work with because of the cardstock weight and nice texture! I was sad to see this Parisian Breeze package retire a few weeks ago but still enjoy using it!I chose to use the plaid side of the DSP on the outside and the petite flowers make a nice "lining" and a pretty surprise for the inside. I also used some Kraft cardstock and the dainty floral for the embellishment and trim on the outside.
Coordinating Baja Breeze ribbon is used for the handle. The flap is cut with one of the dies from the Lots of Tags set of Sizzlits and it was layered
on Kraft cardstock. A Baja Breeze button centered with a silver mini brad is added to the flap; a hook and loop square is used for fastening.
No inks or stamps used!
Paper: Parisian Breeze Designer Series Specialty
paper; Kraft card stock
Accessories: Lots of Tags Sizzlits, Big Shot, Baja Breeze button, Silver Mini Brad, hookj and loop fastener
These boxes are easy and fun to make and give filled with small treasures or candy! I have a couple more to share another time!
Thanks for dropping by today! Welcome back soon!
Margaret
Margaret
Friday, July 17, 2009
Gone Stitching: Blogger's Challenge #108!
Today's challenge for us Blogger's Challengers is "stitching" on a project. It can be real stitching with a machine or by hand, or "faux stitching". I chose the "faux stitching" for my "faux purse". Is nothing real anymore? lol!
Well, to answer my own question, my appreciation for the Big Shot is real and growing everytime I use it to make something fun, easy, pretty and/or that I would never cut out by hand! lol!
I made another box with my Box #2 Die! No surprise there! I was inspired by Julia Bettencourt's purses and wanted to try it myself so... what could be better for a purse than suede? Soft Suede, that is, one of SU's new In Colors for this year! And of course, we need stitching on our bag for that casual sporty look we love so I added it with the journaling tip of my new In Color Stampin' Write Marker (hooray!) in the same Soft Suede color!
I added a 3/4" strip of card stock onto the front flap that normally would be inserted into the box, then enhanced it with a Sizzix die cut from the Lots of Tags Sizzlet set (of 4). A nice thick small Circle Brad enhances the look. I added a 7/8" strip of cardstock for the handle and inserted a Silver Mini Brad on each side to secure it and add some more of that touch of metal we like on our purses.

Hmm, all that suede made me long for a little color so I added it in the form of a colorful lining! The beautiful Autumn Traditions Designer Series Paper was just perfect! Some of the designs incorporate Soft Suede in the color scheme and, even though this one didn't, it still complements it. Isn't that print gorgeous"!
As you can see, I did faux stitching around each panel on the "purse", the lid/flap and the piece on the front. You can't see the stitching on the handle, but it's there. The final touch of silver is the chain with a small Filagree Flower on it. You know every designer handbag has to have it's signature symbol thing-y! LOL!
Inks: Soft Suede Stampin' Write Marker from In Color Marker assortment of 6
Paper: Autumn Traditions DSP; Soft Suede card stock
Tools: Big Shot, Box #2 Die, Lots of Tags set of 4 Sizzlets dies.
Accessories: Circle Brads, Filagree Brads, Silver brads, key chain.
I hope you enjoy my "faux" stitching project. I feel a little bit guilty since I used to teaching sewing and clothing construction and went the "faux" route today but... naw, not really. :) It was fun!
Have a Happy Friday and a great weekend! Stamp a little.. it's good therapy!
Margaret
p.s. Everything is from Stampin' Up! but the key chain. All these products can be ordered directly from my Stampin' Up! website here or through me (funstampin @ cox.net). Thanks!
Well, to answer my own question, my appreciation for the Big Shot is real and growing everytime I use it to make something fun, easy, pretty and/or that I would never cut out by hand! lol!I made another box with my Box #2 Die! No surprise there! I was inspired by Julia Bettencourt's purses and wanted to try it myself so... what could be better for a purse than suede? Soft Suede, that is, one of SU's new In Colors for this year! And of course, we need stitching on our bag for that casual sporty look we love so I added it with the journaling tip of my new In Color Stampin' Write Marker (hooray!) in the same Soft Suede color!
I added a 3/4" strip of card stock onto the front flap that normally would be inserted into the box, then enhanced it with a Sizzix die cut from the Lots of Tags Sizzlet set (of 4). A nice thick small Circle Brad enhances the look. I added a 7/8" strip of cardstock for the handle and inserted a Silver Mini Brad on each side to secure it and add some more of that touch of metal we like on our purses.

Hmm, all that suede made me long for a little color so I added it in the form of a colorful lining! The beautiful Autumn Traditions Designer Series Paper was just perfect! Some of the designs incorporate Soft Suede in the color scheme and, even though this one didn't, it still complements it. Isn't that print gorgeous"!
As you can see, I did faux stitching around each panel on the "purse", the lid/flap and the piece on the front. You can't see the stitching on the handle, but it's there. The final touch of silver is the chain with a small Filagree Flower on it. You know every designer handbag has to have it's signature symbol thing-y! LOL!
Inks: Soft Suede Stampin' Write Marker from In Color Marker assortment of 6
Paper: Autumn Traditions DSP; Soft Suede card stock
Tools: Big Shot, Box #2 Die, Lots of Tags set of 4 Sizzlets dies.
Accessories: Circle Brads, Filagree Brads, Silver brads, key chain.
I hope you enjoy my "faux" stitching project. I feel a little bit guilty since I used to teaching sewing and clothing construction and went the "faux" route today but... naw, not really. :) It was fun!
Have a Happy Friday and a great weekend! Stamp a little.. it's good therapy!
Margaret
p.s. Everything is from Stampin' Up! but the key chain. All these products can be ordered directly from my Stampin' Up! website here or through me (funstampin @ cox.net). Thanks!
Subscribe to:
Posts (Atom)